Hello All,
Today we will see how to setup Jet Report extension in Business Central. Frist we will see what is Jet Reports and use in Business Central setup it to our Business Central.
What are Jet Reports?
Jet Reports delivers a fast, accurate business reporting solution built for Microsoft Dynamics 365 Business Central that gives you the flexibility to create any report you need directly inside of Excel. Jet Reports extension provided by Microsoft App Source. Also, we can use Jet Reports for Financials to calculate fastest and accurate our data inside Excel.
1.Installing the Jet Reports Extension from extension management in Business Central.
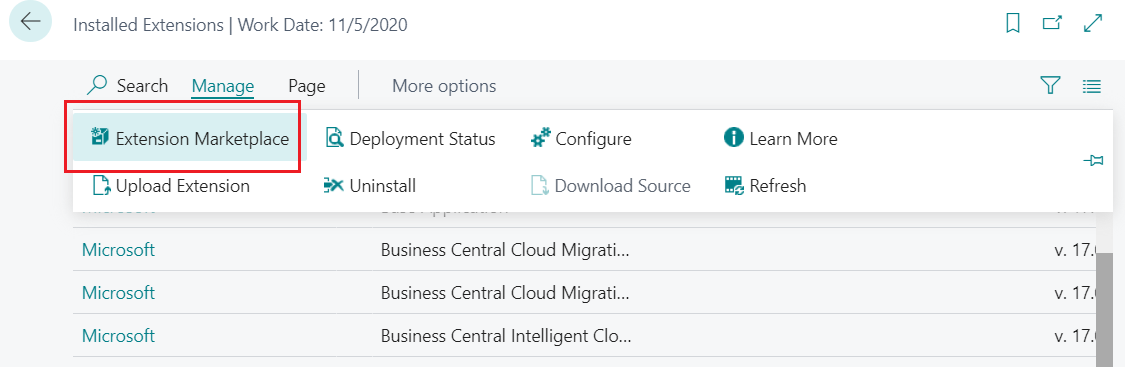
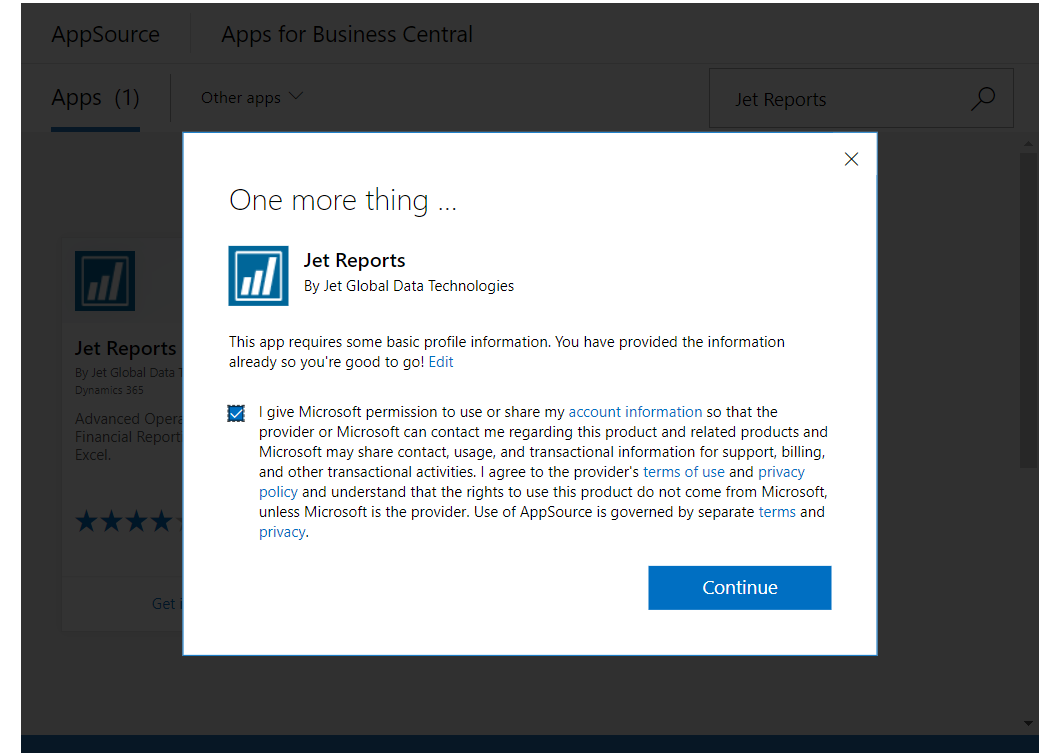
2. Jet Report Extension from Microsoft App Source.

3.Install Jet Report Extension to our Business Central.
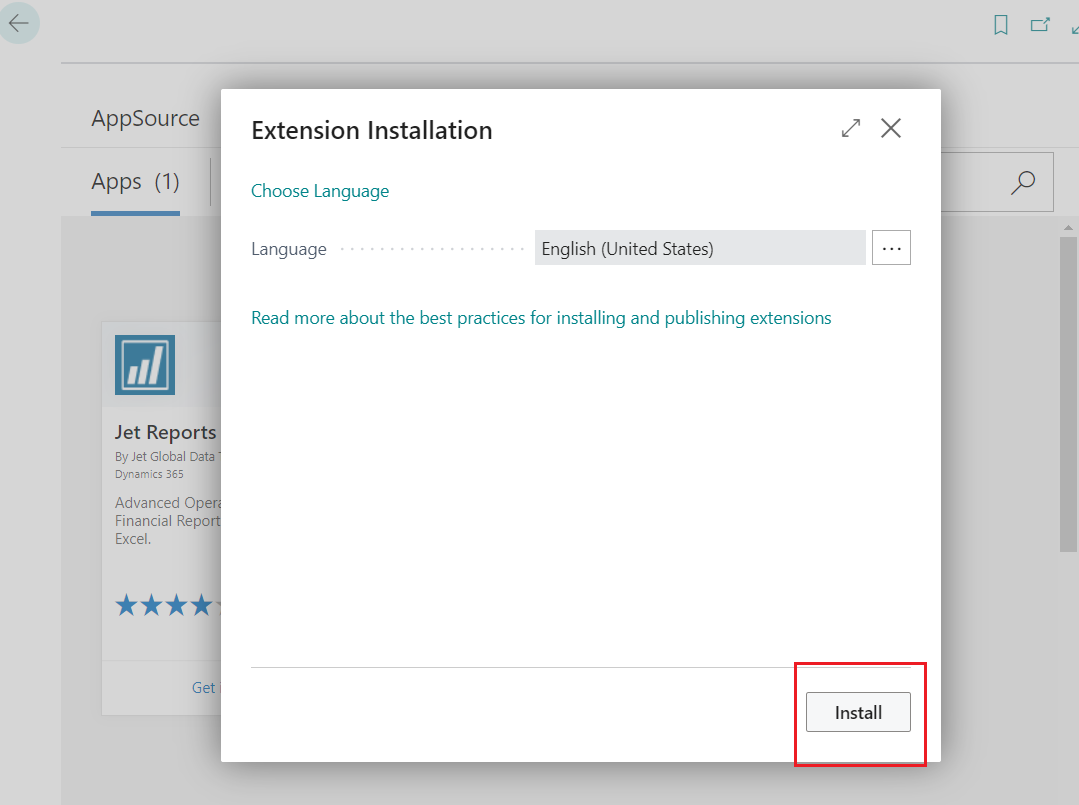
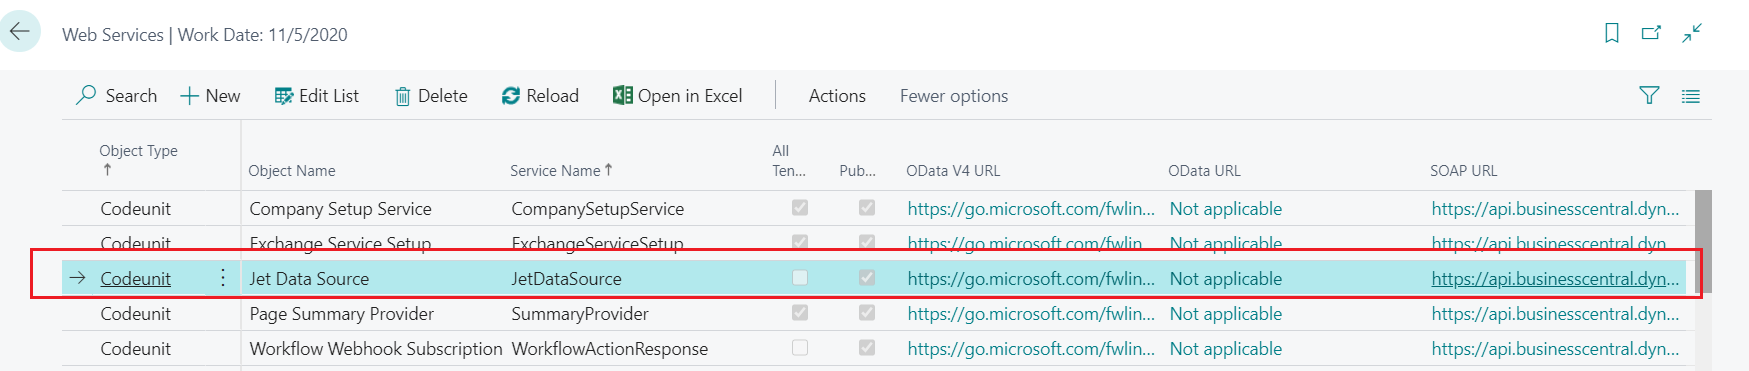
4. Here we can see Jet Report Extension is installed in our Extension Management.

5. Now we will establish connection between Jet Reports and Business Central.
If you don’t install Jet Report setup then first you should have installed Jet Report setup.
You can download from this link:
After downloading Jet Report, you can see Jet Ribbon in Excel.

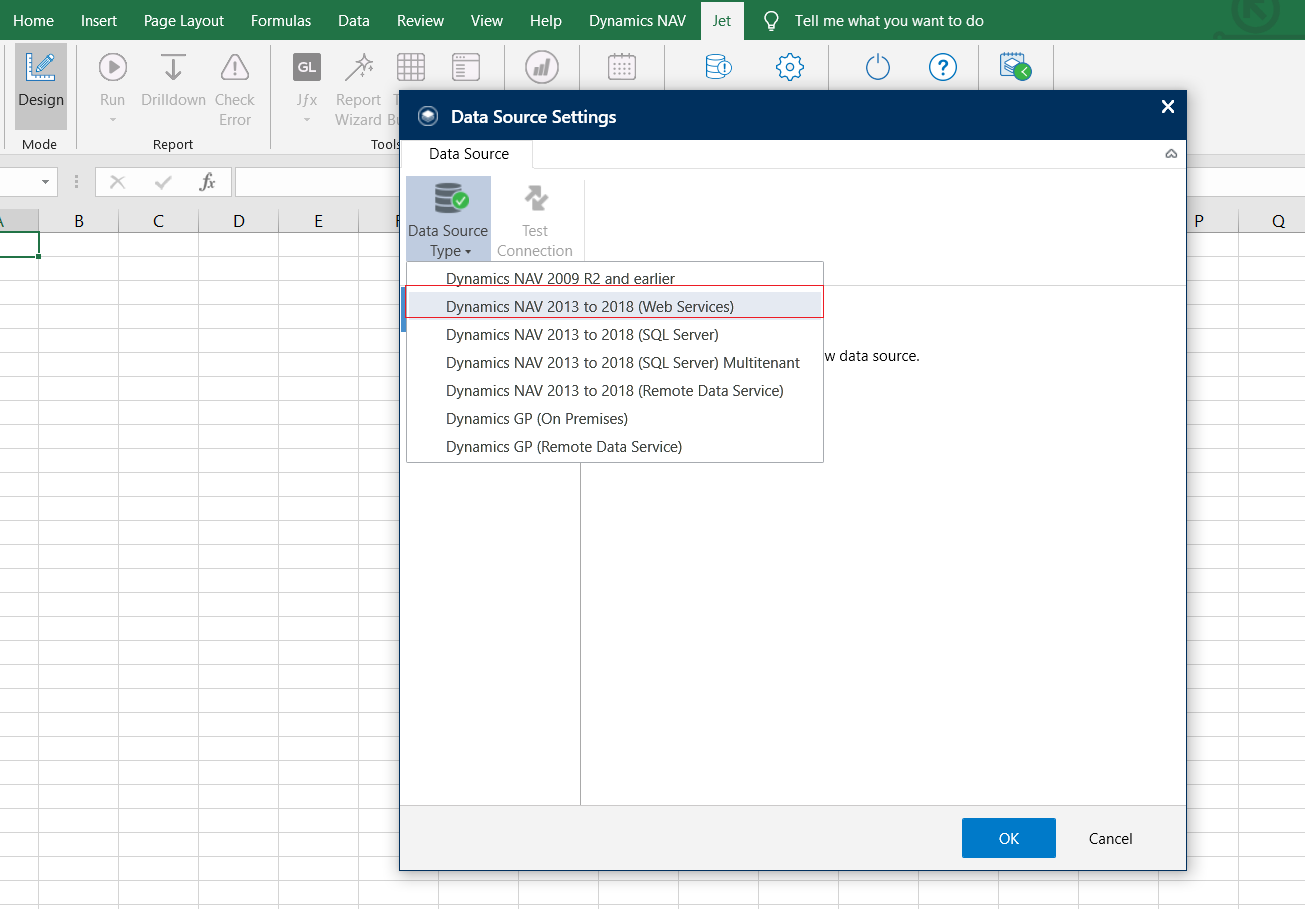
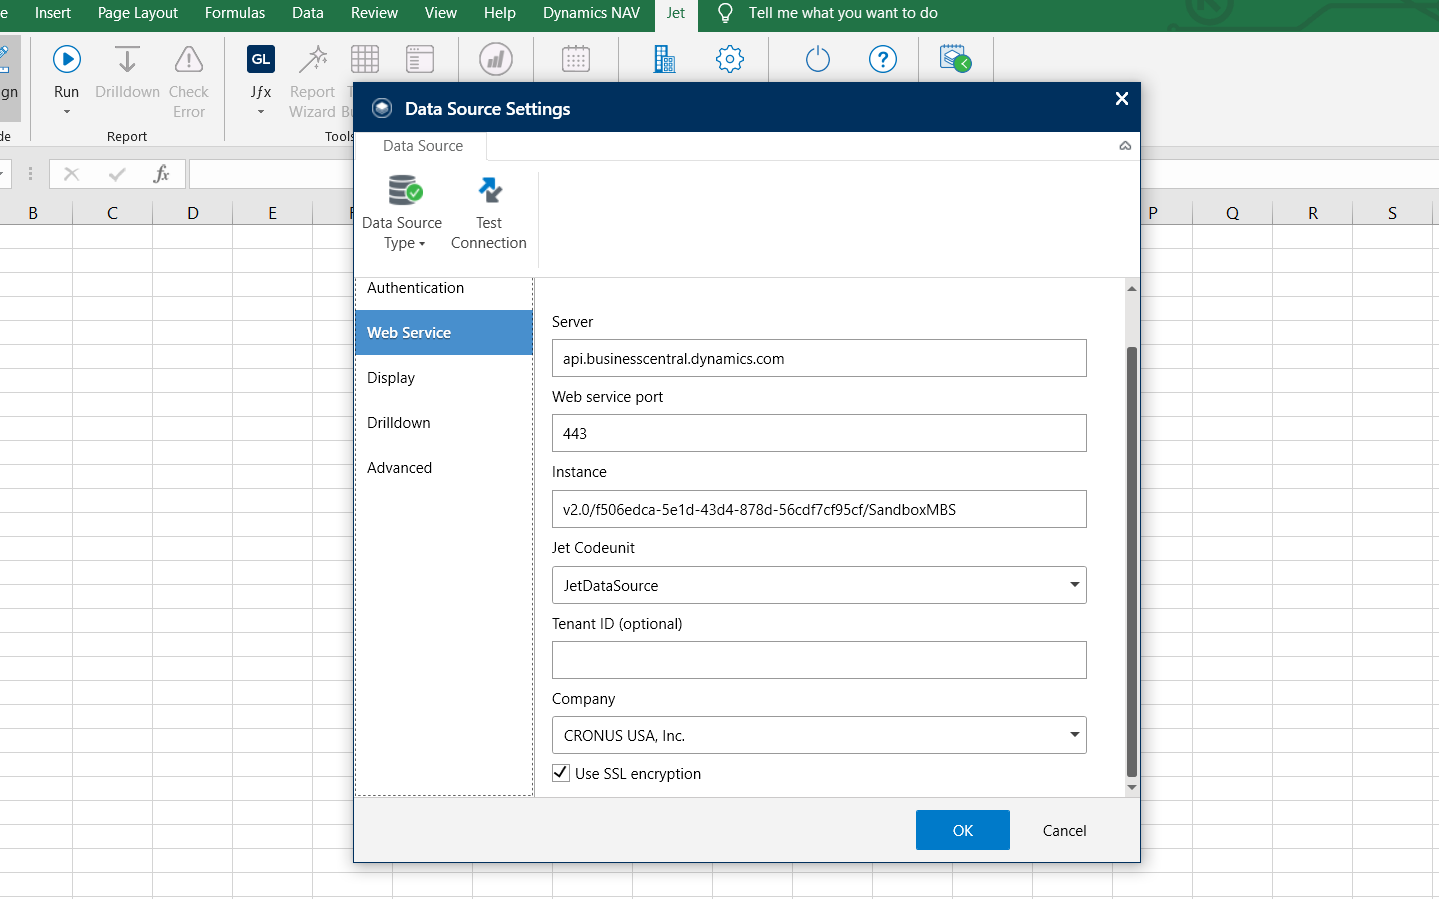
6. From settings select Data Source Settings in Jet Ribbon.

7. Select Dynamics NAV 2013 to 2018(Web Services).
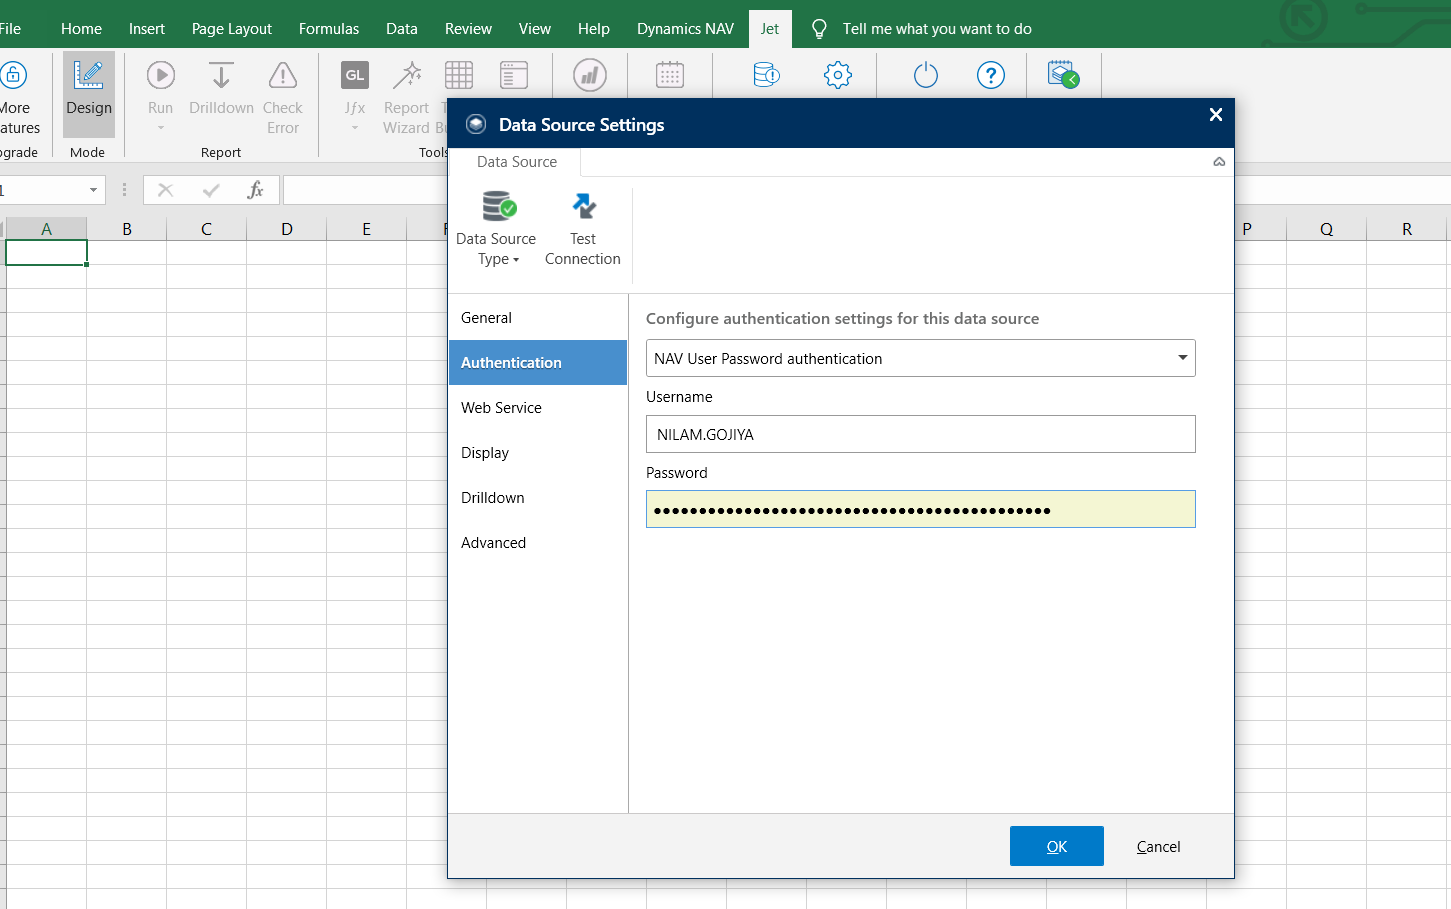
8. Now we Authenticate using User Name and Webservice Key.
Open this OData link using UserID and Password.

9. Now set Server, Webservice Port, Instance, Jet Codeunit, Company, Use SSL Encryption.
Server: api.businesscentral.dynamics.com
Web Service Port: 443
Instance: v2.0/TenantID /EnvironmentName
Select Company:
User SSL Encryption: True
10. Now click on Test Connection and you can see company name in selected area in this picture.
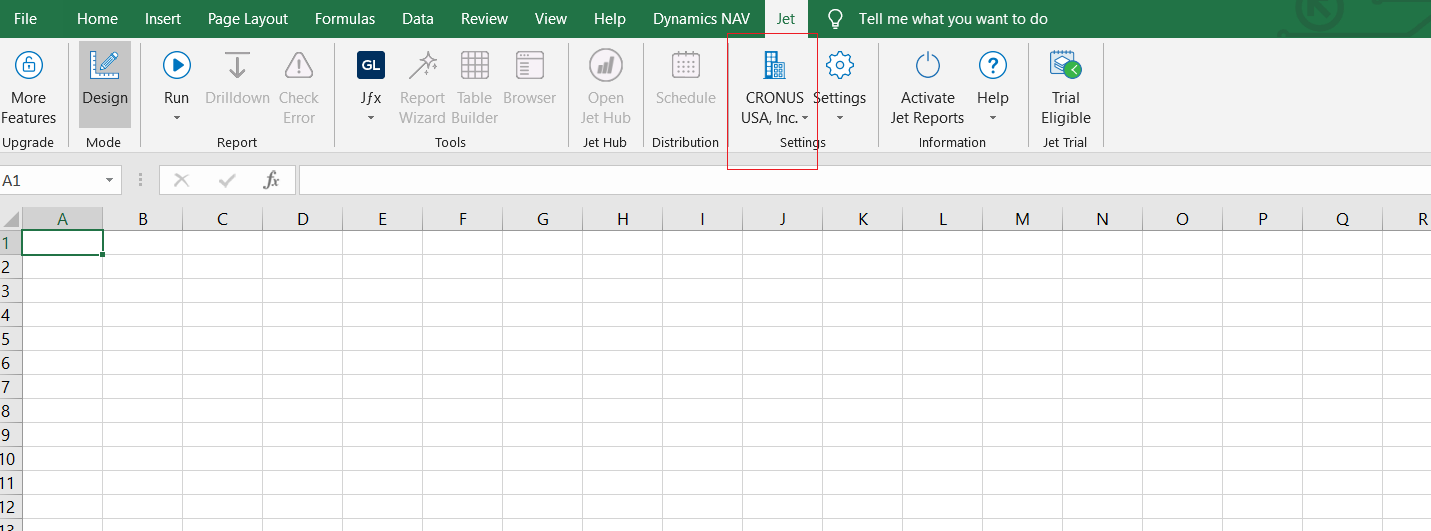
Now Dynamics 365 Business Central data source is ready to be used in Jet Reports.
Hope this blog is useful and you like this blog. Thank you…