 You-tube

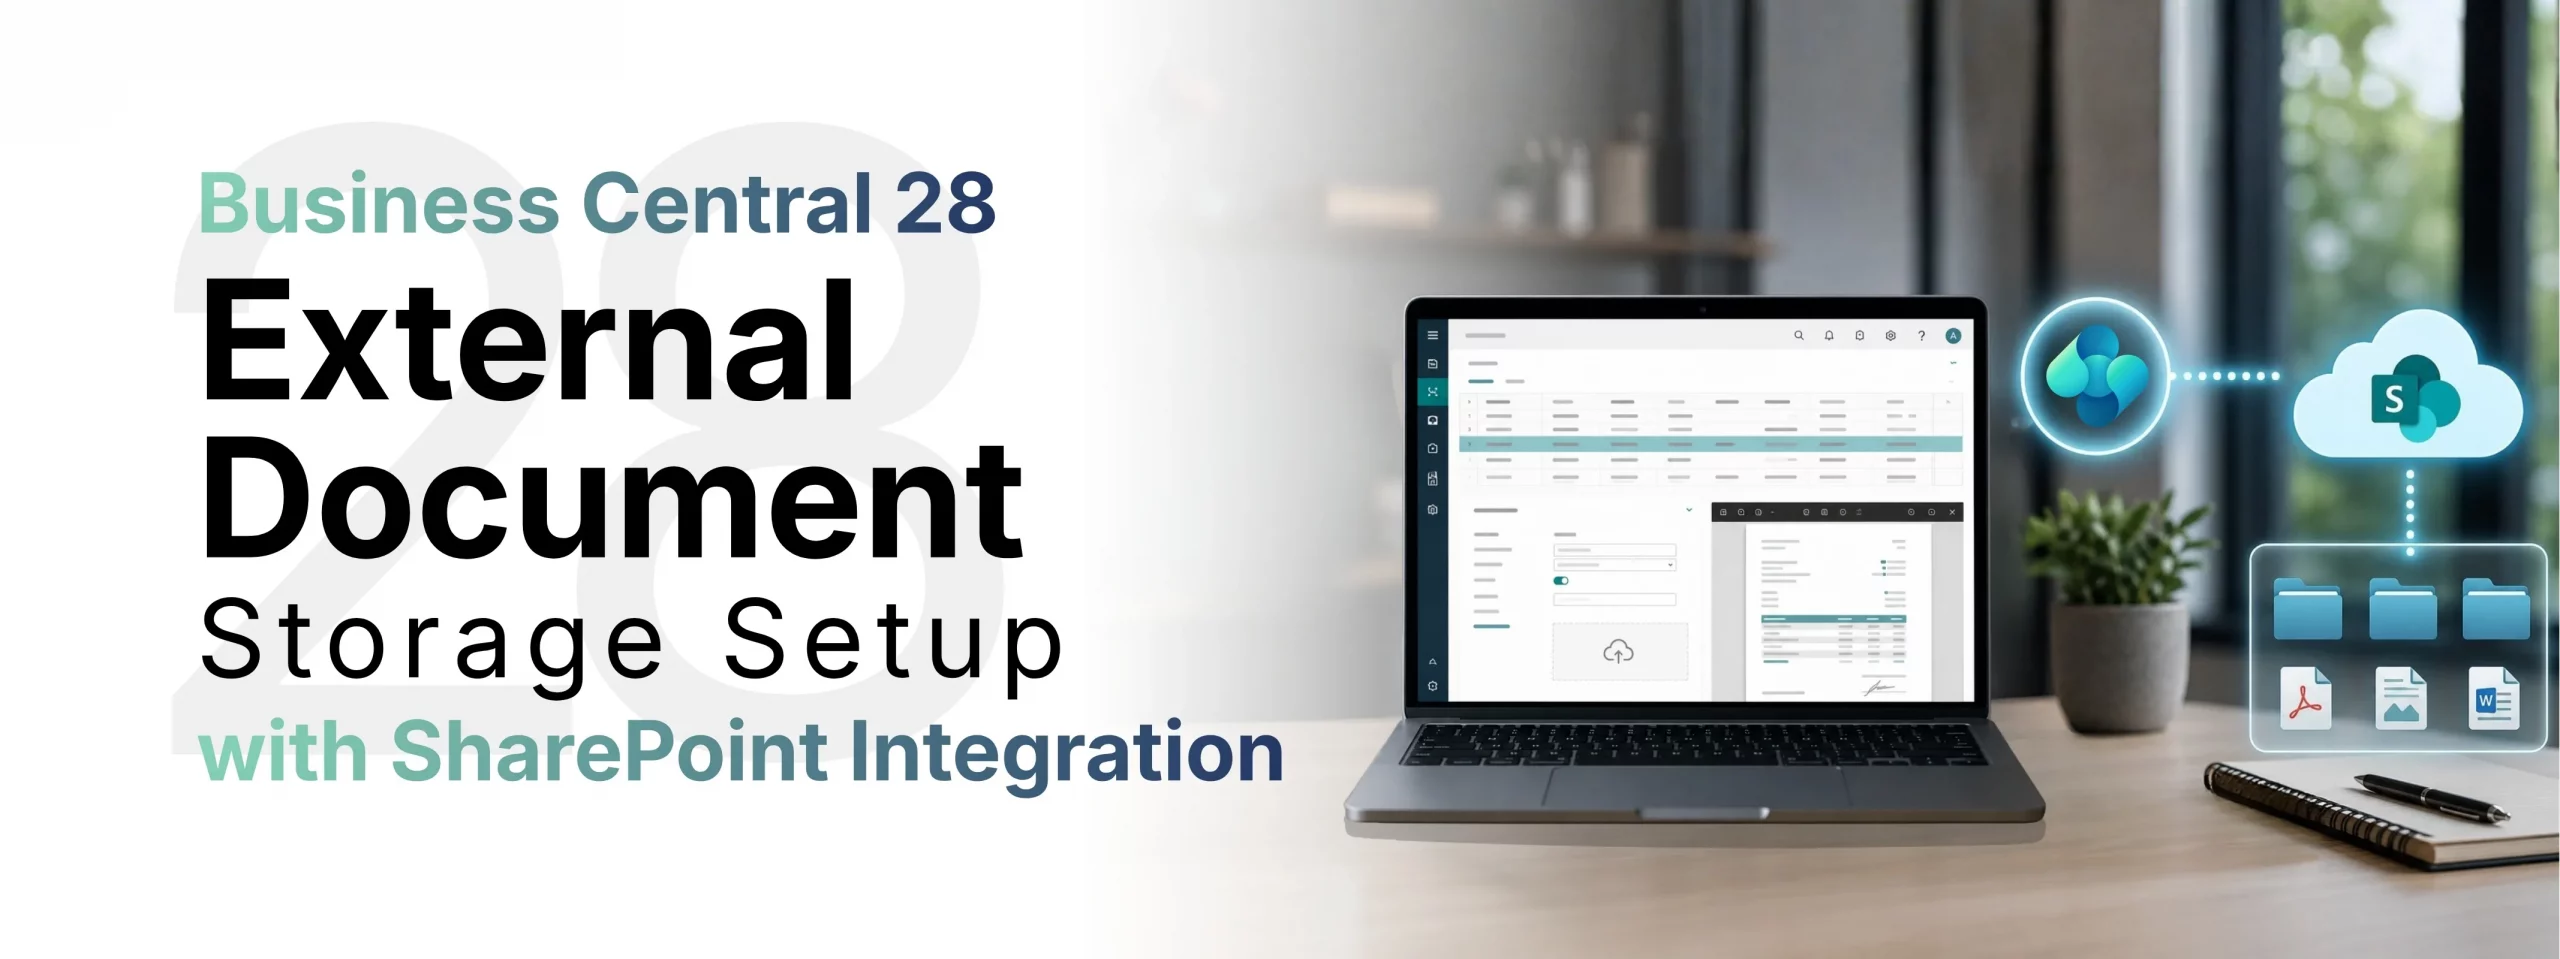

Microsoft Dynamics 365 Business Central (BC) 28 – released as part of the 2025 Wave 2 update introduces a powerful capability: storing document attachments externally in Microsoft SharePoint rather than within the Business Central database itself. This eliminates database bloat, improves performance, and gives organizations centralized control over their documents within familiar Microsoft 365 tooling.
- Reduces database storage costs and growth
- Leverages SharePoint’s rich permission and compliance model
- Keeps documents accessible from Teams, SharePoint, and BC in one place
- Prevents file name collisions using GUID-based renaming
- Supports structured folder hierarchies per company, environment, and table
How an External Document Storage Works
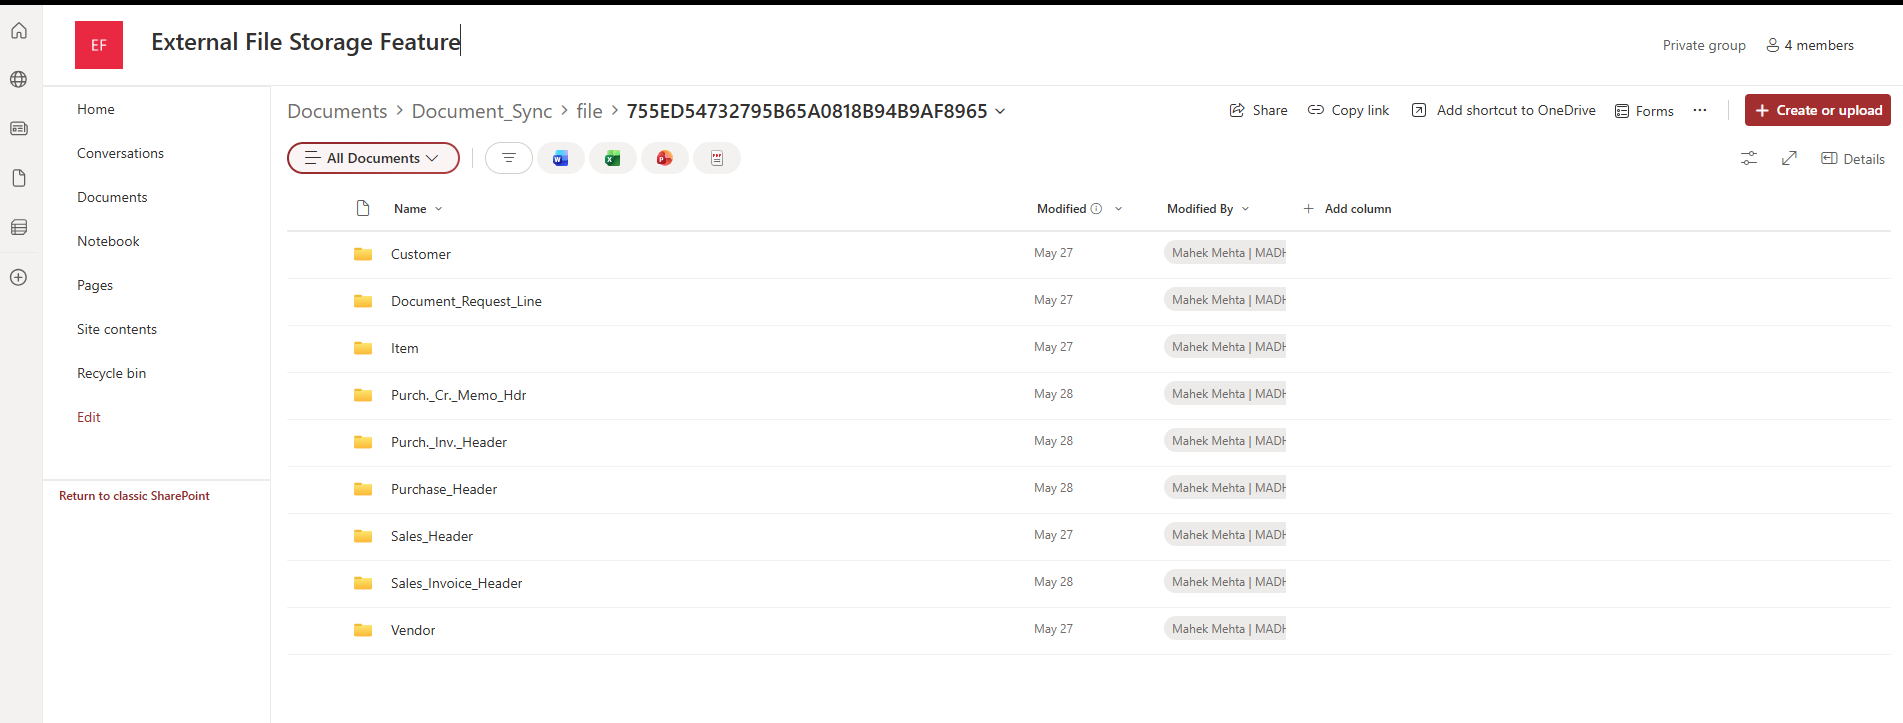
When the “External Storage – Document Attachments” extension is enabled, Business Central routes every file attachment to your configured external storage account instead of the internal database. The module maps each document to its origin table and stores it in a corresponding folder within the external storage hierarchy:
- A file attached to a Sales Order is stored under the Sales Header folder
- A file linked to a Customer record is stored under the Customer folder
- Subfolders follow a structured path: environment → company → table name
To prevent overwriting issues especially in shared repositories the module appends a Globally Unique Identifier (GUID) to every filename before uploading. This ensures that even identically named files from different records coexist without conflict.
Prerequisites: Register an App in Microsoft Entra ID
Before configuring Business Central, you must register an application in Microsoft Entra ID (formerly Azure Active Directory) to allow BC to authenticate against your SharePoint site.
Required Credentials
You need the following three values from your Entra ID App Registration:
- Tenant ID – Your Azure Active Directory directory (tenant) ID.
- Client ID – The Application (client) ID assigned during app registration.
- Client Secret – A secret generated under Certificates & Secrets.
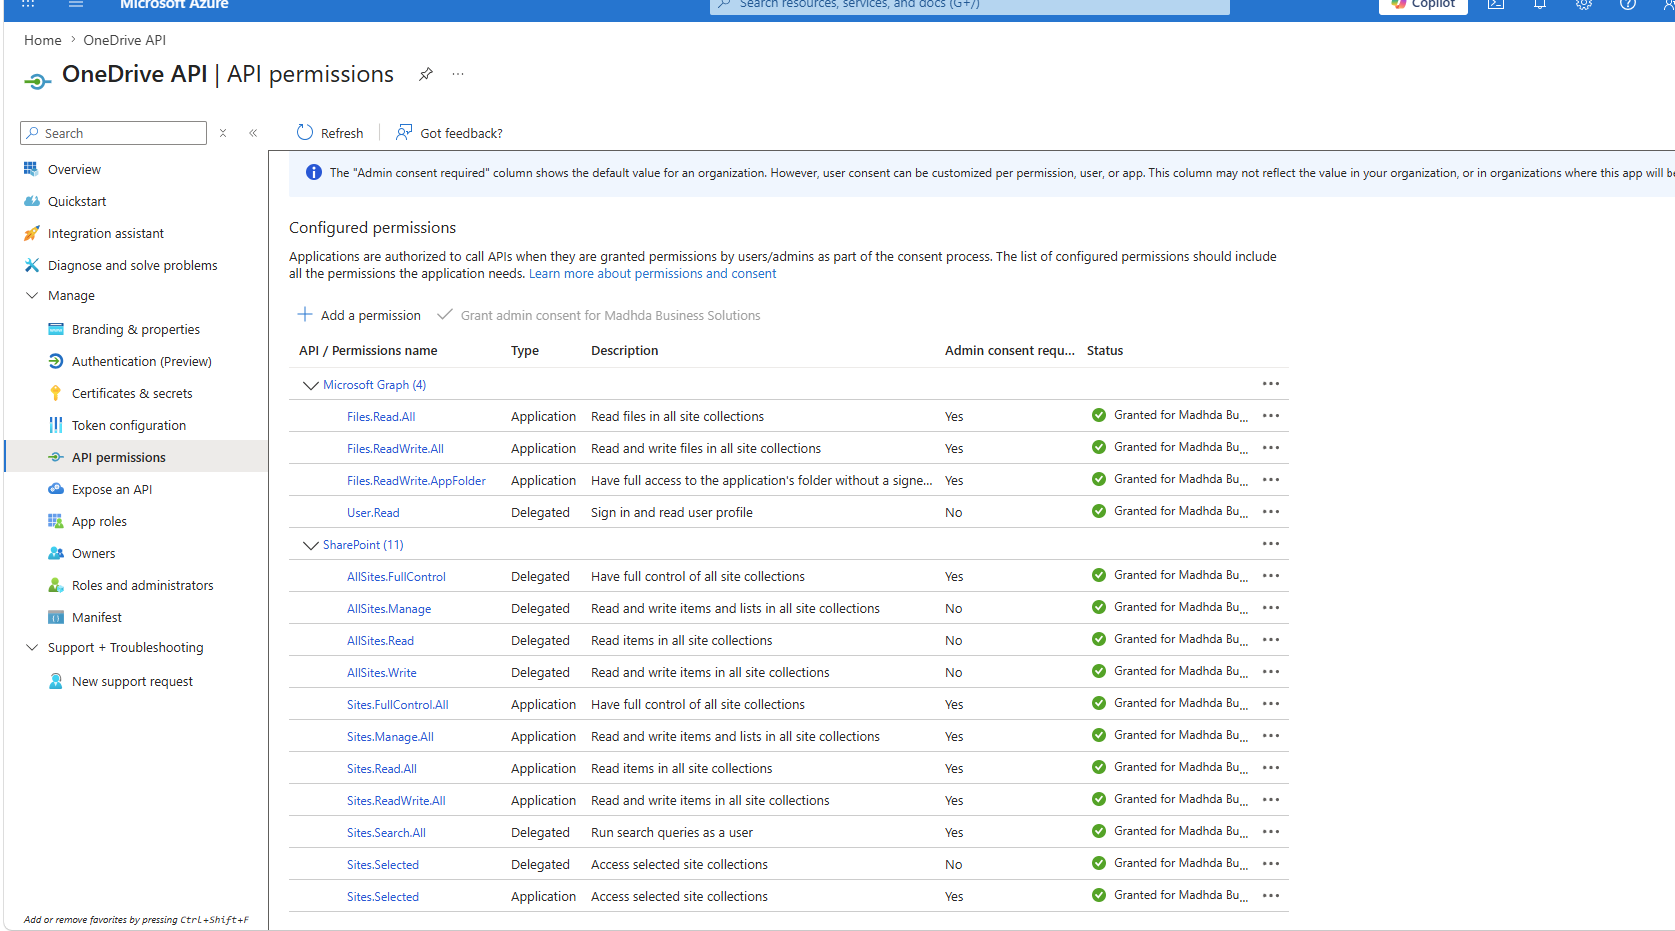
Required API Permission
In your app registration, grant the following permission under API Permissions:
Redirect URI
Under Manage → Authentication in your app registration, add the following Redirect URI:
Step 1 – Set Up an External File Account
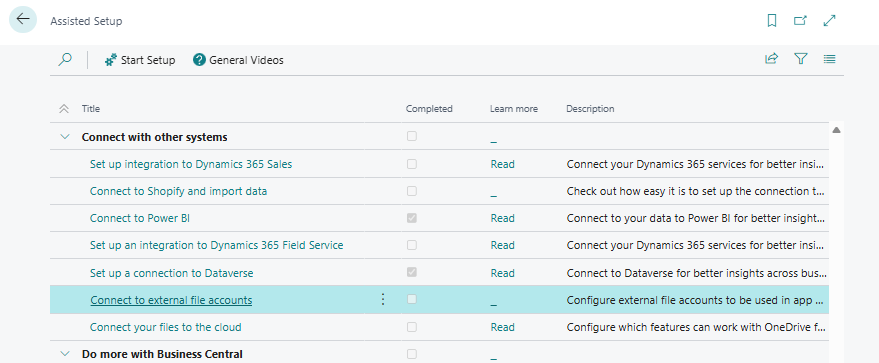
Open Business Central and press Alt+Q to open the search bar. Type “External File Accounts” and select the related link. Alternatively, navigate via: Assisted Setup → Connect to external file accounts.
How to Add a File Account
- Choose Add a file account to start the setup guide.
- Select SharePoint as the storage type, then choose Next.
- Fill in all required SharePoint configuration fields (see table below).
- Choose Next, review the information, and choose Finish.
SharePoint Configuration Fields
| Field | Description |
|---|---|
| Account Name | A descriptive name for this connection in Business Central |
| Tenant ID | The Microsoft Entra ID Tenant ID (Directory ID) |
| Client ID | The Application ID from your App Registration |
| Authentication Type | Client Secret (user grant flow) or Certificate (client credentials flow) |
| Client Secret | The secret value from your App Registration |
| SharePoint Name | Full URL to your SharePoint site (e.g., https://yourcompany.sharepoint.com/sites/YourSite) |
| Base Relative Folder Path | Folder path relative to the site root (e.g., Shared Documents/BC) |
Fill in the SharePoint Account Details
Now you’ll see the Setup SharePoint Account form. This is where you paste in the credentials you gathered from Entra ID.
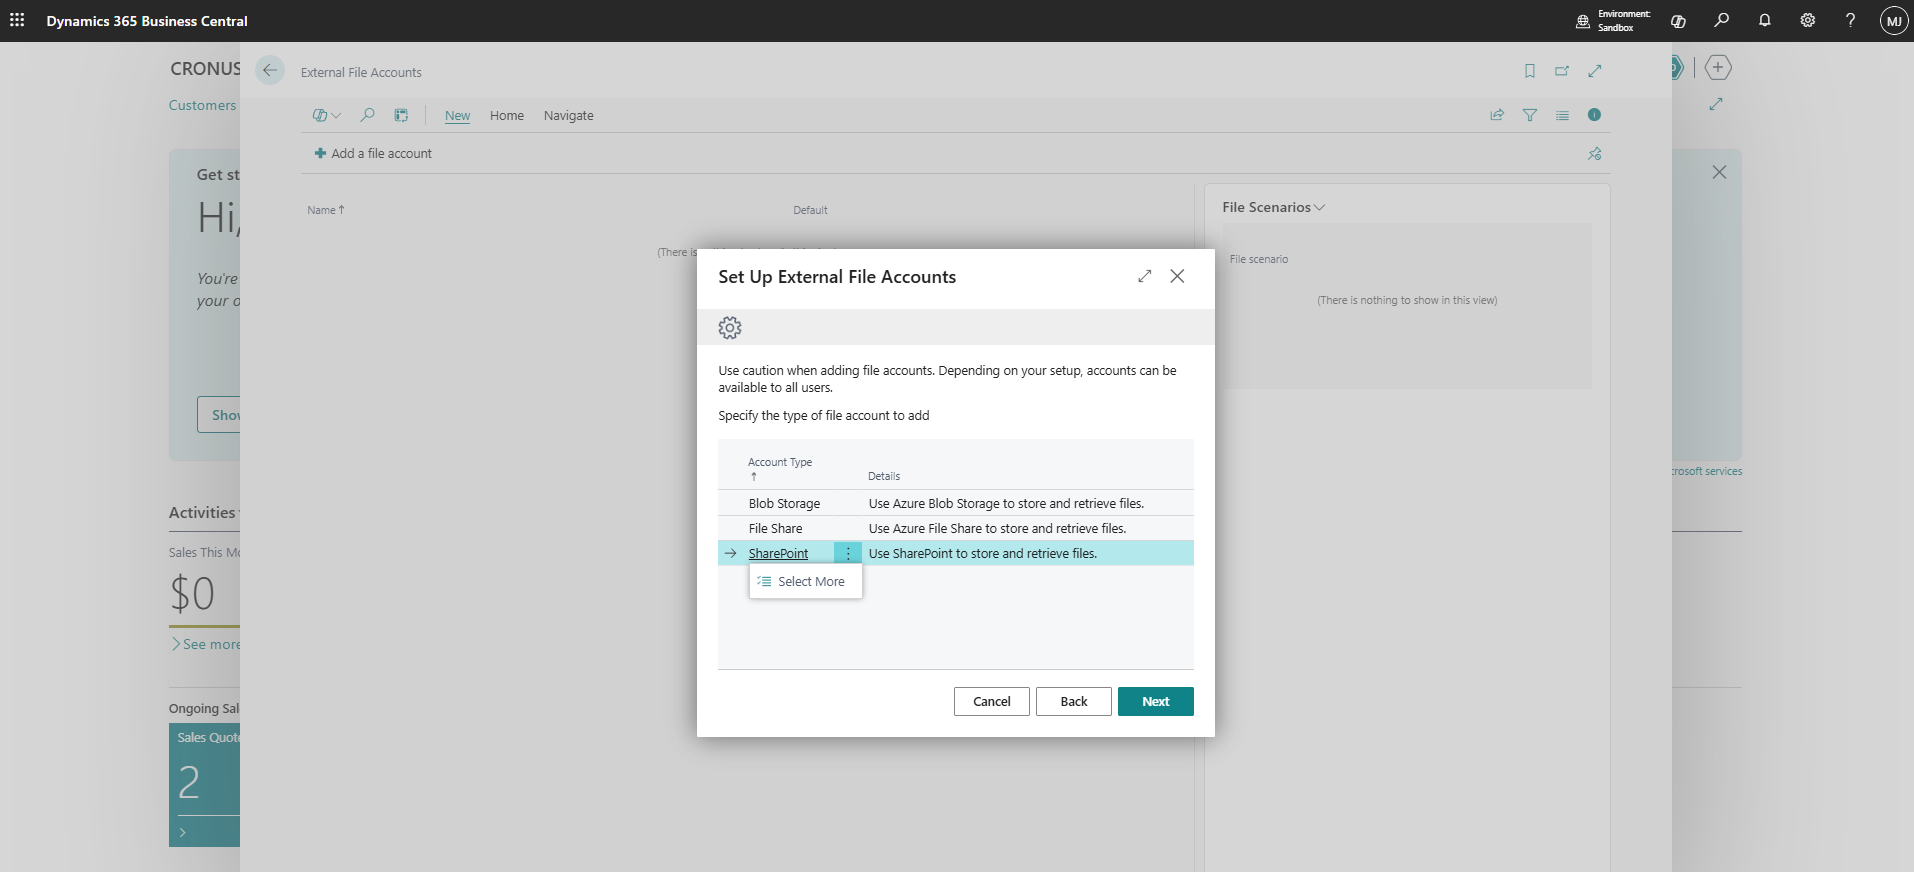
Selecting SharePoint from the account type list. Blob Storage and File Share are also available if needed.
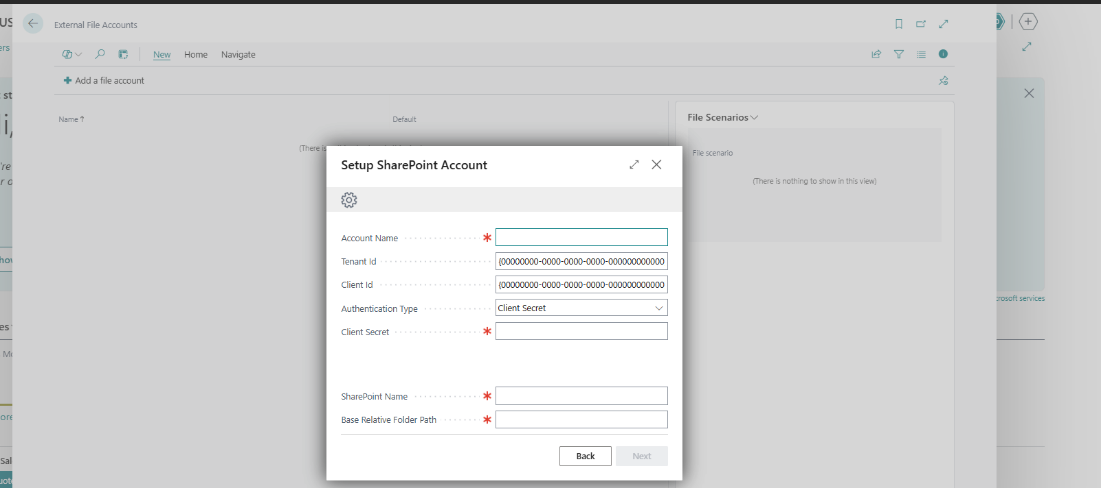
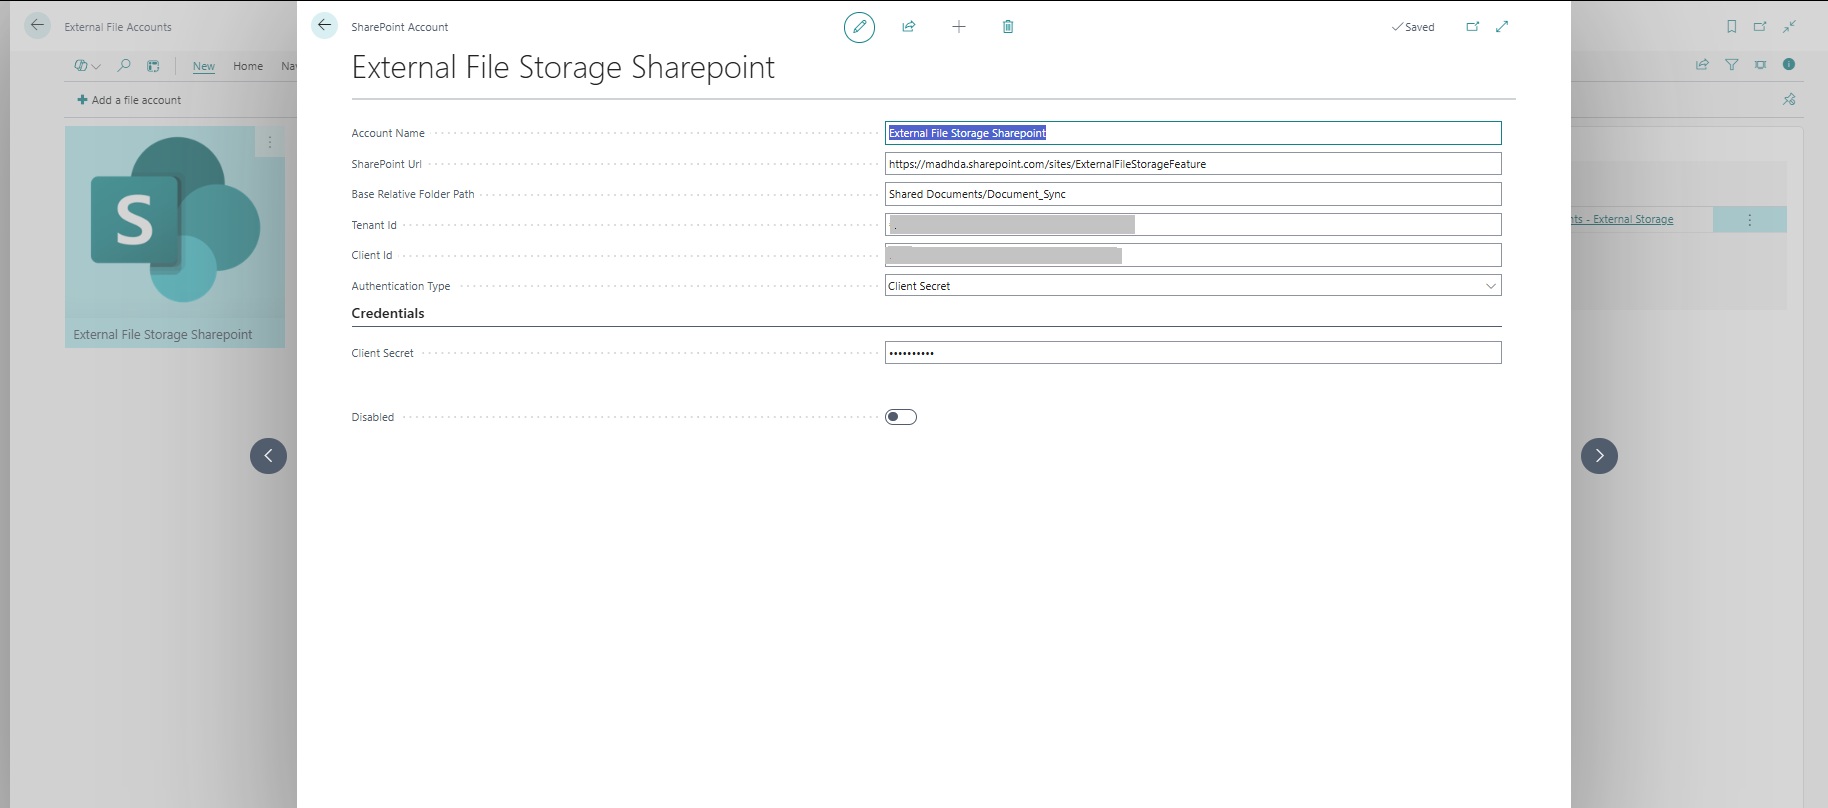
The SharePoint account setup form – Account Name, Tenant ID, Client ID, Client Secret, SharePoint URL, and Folder Path are all required.
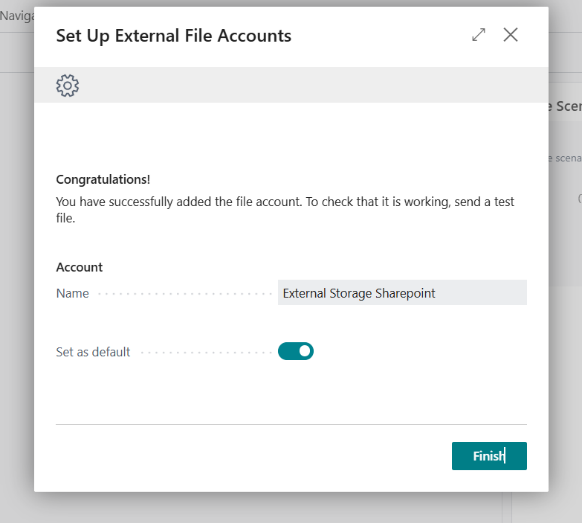
Success the account “External Storage SharePoint” has been created and set as the default.
Verify the Connection
On the External File Accounts page, select your account and choose Storage Browser. If the External Storage Browser page opens and displays your configured folders, the connection is working correctly.
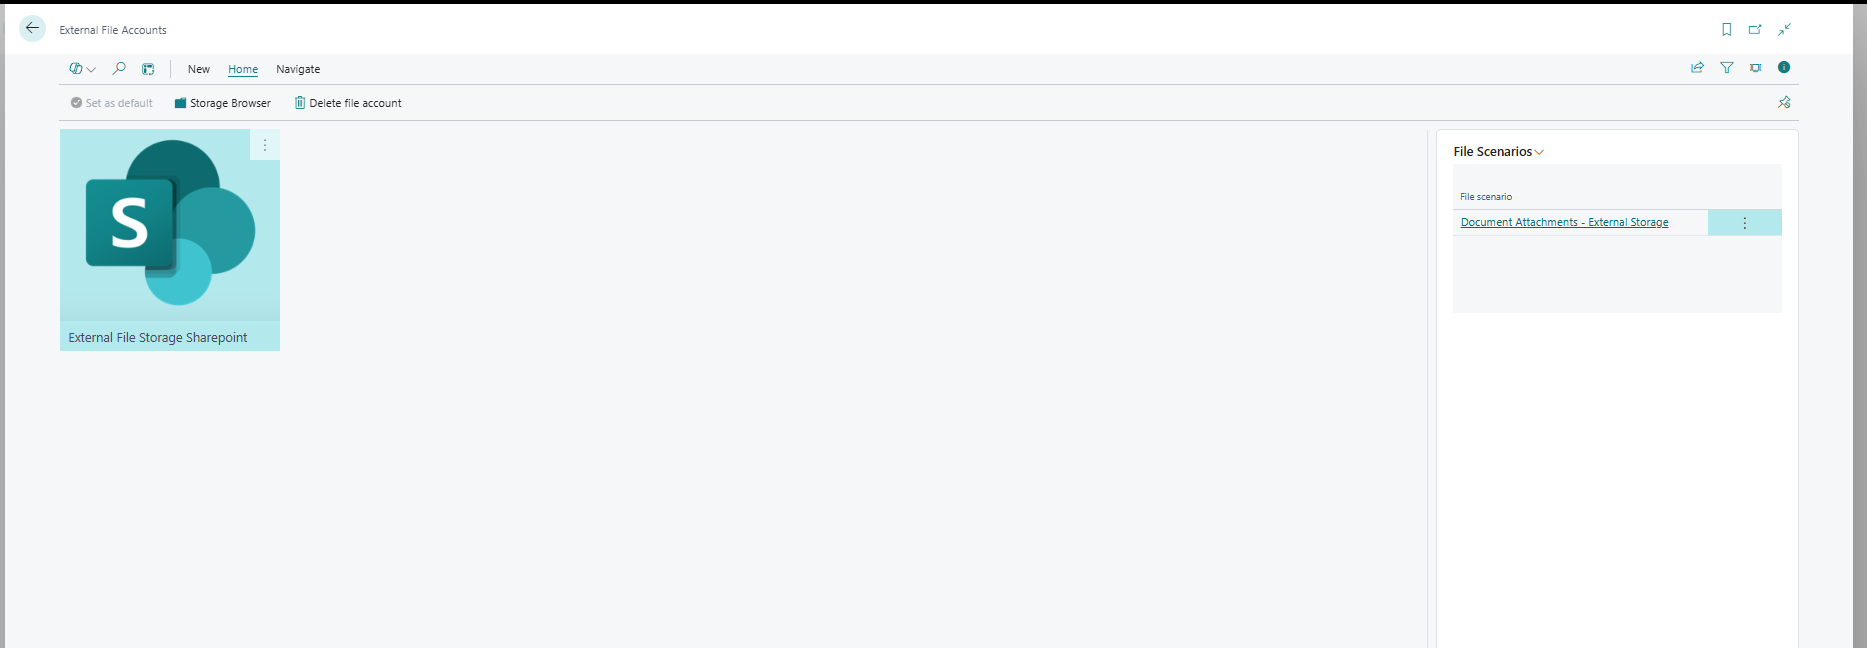
On the External File Accounts page, click Home → Storage Browser to open the browser.
Step 2 – Assign the Document Attachments Scenario
Once your file account is created, you need to assign the Document Attachments scenario to it.
- Search for File Scenario Assignment using Alt+Q.
- Choose Assign Scenarios to open the assignment page.
- Locate the SharePoint file account you created and choose OK.
- Select the file account line and choose Assign Scenarios or Edit.
- Select Document Attachments – External Storage and confirm.
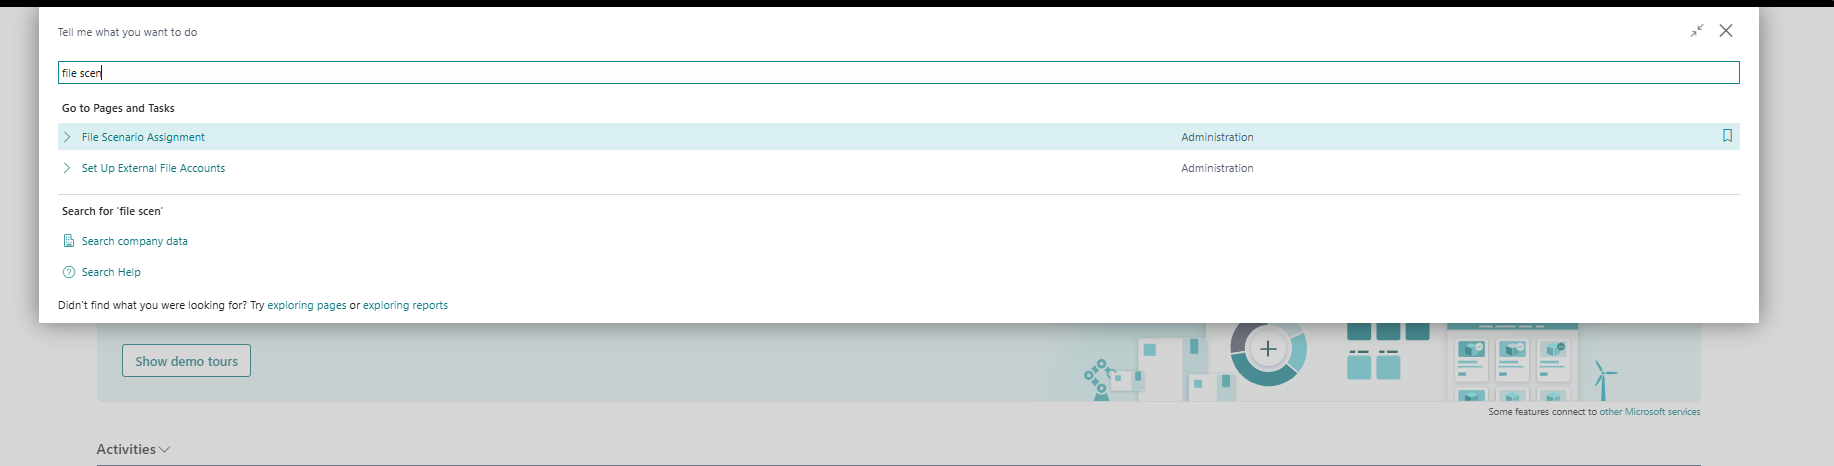
Searching for “File Scenario Assignment” – click the Administration result to open the page.
| ⚠️ Troubleshooting: “Nothing to Show” Dialog | |
| Issue | If the “Assign scenarios to account” dialog shows “There is nothing to show in this view”, the “External Storage – Document Attachments” extension is NOT installed in your environment. |
| Resolution | Install the extension from the BC Extension Marketplace, then return to: Search → File Scenario Assignment → Assign Scenarios Click on External Storage SharePoint the dialog should now show the scenario as an option. |
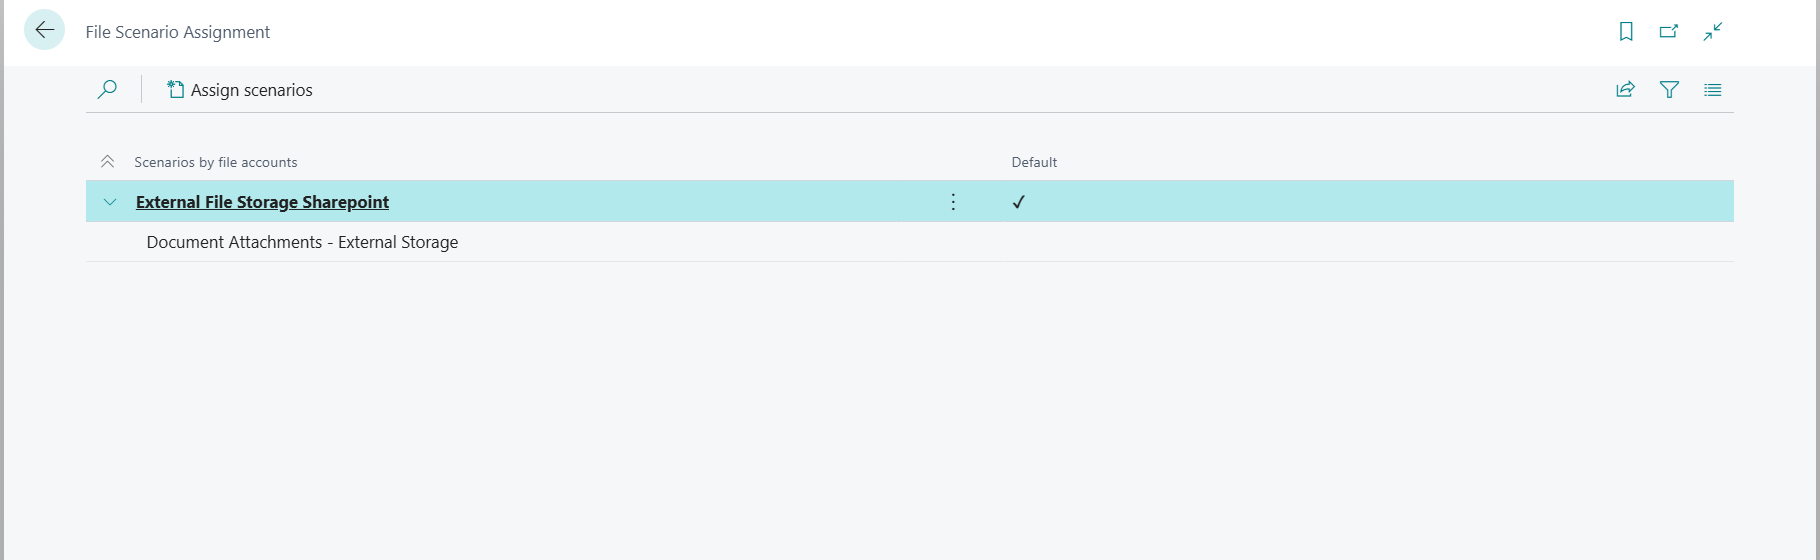
After assignment, the File Scenario Assignment page shows “External File Storage Sharepoint” expanded to reveal the “Document Attachments – External Storage” sub-entry.
Step 3 – Configure External Storage Setup
After assigning the scenario, the External Storage Setup page opens automatically. Complete the following configuration:
Enable External Storage
Turn on the Enabled toggle. Business Central will display a warning that using external storage is at your own risk. Read the notice carefully and choose Yes to proceed.
Set the Root Folder
Choose an existing folder in your SharePoint storage to serve as the root for all attachments. Business Central will automatically create and manage subfolders using this structured hierarchy:
Folder Hierarchy Structure
Configure File Deletion Behaviour
The Delete External File on Attachment Delete toggle controls what happens when an attachment is removed in BC:
- Enabled: Deleting an attachment in Business Central also permanently deletes the file from SharePoint.
- Disabled: The file remains in SharePoint but loses its link in Business Central. Useful for audit/compliance scenarios.
Choose Close to complete the setup. Your external document attachment storage is now fully configured.

The External Storage Setup form in full view Enabled ON, Root Folder “file”, and the Delete External File toggle also enabled.
Seeing It in Action: Attaching Documents
Once external storage is enabled, the user experience inside Business Central doesn’t change at all. A user working on a Sales Order attaches a PDF the same way they always have. What changes is where the file lands.
Here’s a Sales Orders list before any attachments have been added the Attachments panel on the right shows zero documents:

Sales Orders list – “Attachments (0)” panel visible on the right. No files stored yet.
The user attaches a file. Instantly the attachment count updates, and the file is simultaneously routed to SharePoint:
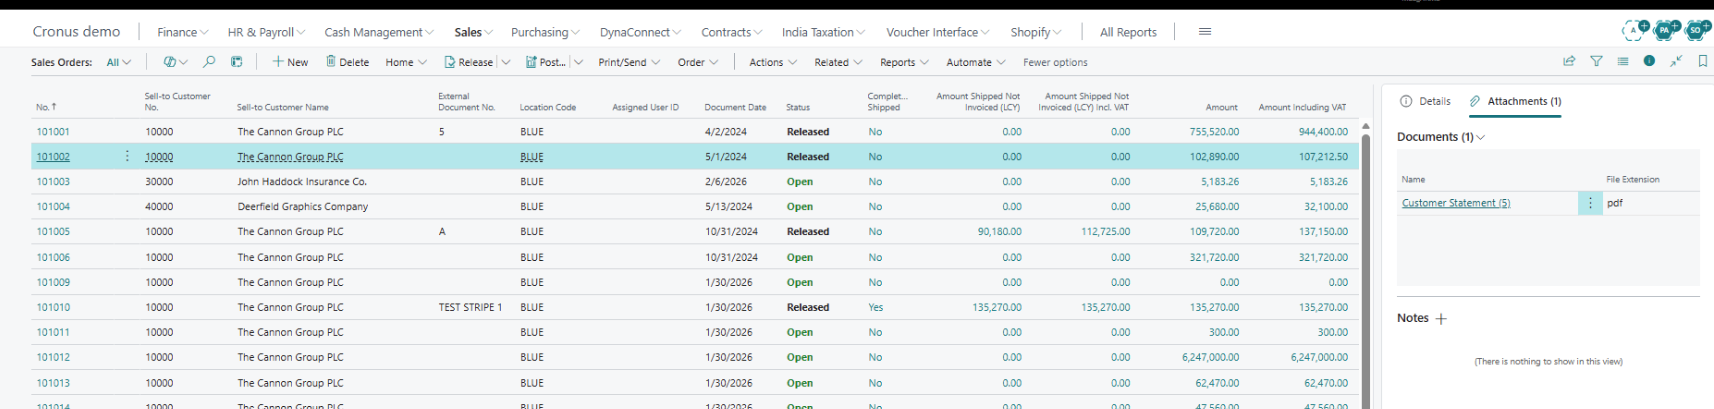
After attaching “Customer Statement (5).pdf” – the Attachments panel now shows 1 document linked to Sales Order 101002.
GUID-Based File Renaming: Preventing Overwrite Conflicts
In Business Central’s external storage model, multiple records can produce files with identical names (e.g., “Invoice.pdf”). When these are stored in a shared folder without modification, overwrites become a real risk.
To mitigate this, the External File Storage module introduces a GUID-based renaming strategy. Before any file is uploaded to SharePoint, the system appends a unique GUID to the filename, ensuring every file is globally unique:

| Example: GUID Renaming in Action | |
| Original Filename | Customer Statement (5).pdf |
| Stored As | Customer Statement (5) -3DE3F5BE-84D6-40B9-95FC-152D2C227F4B.pdf |
| This guarantees uniqueness across all tables, companies, and environments even if two records share the same document name. | |
Managing Attachment: The Document Attach
The External Storage Setup page has a Document Attachments tab that gives you a full audit view of every file that has been uploaded to external storage. This is your central dashboard for tracking what’s stored were.
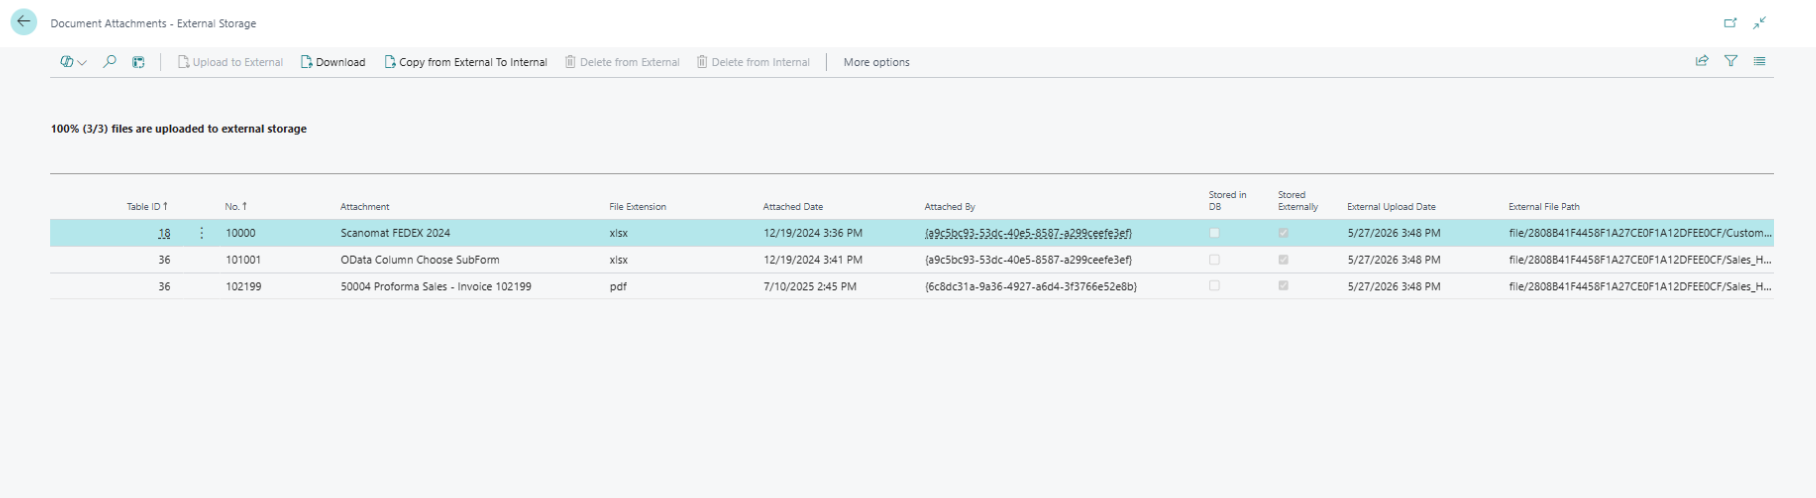
The Document Attachments tab showing 100% (3/3) files uploaded, with Table ID, record number, filename, extension, upload date, and the full external path in SharePoint.
As users keep attaching files, this list grows. The tab shows both internal and external storage status columns, so you can tell at a glance which files have been successfully migrated:
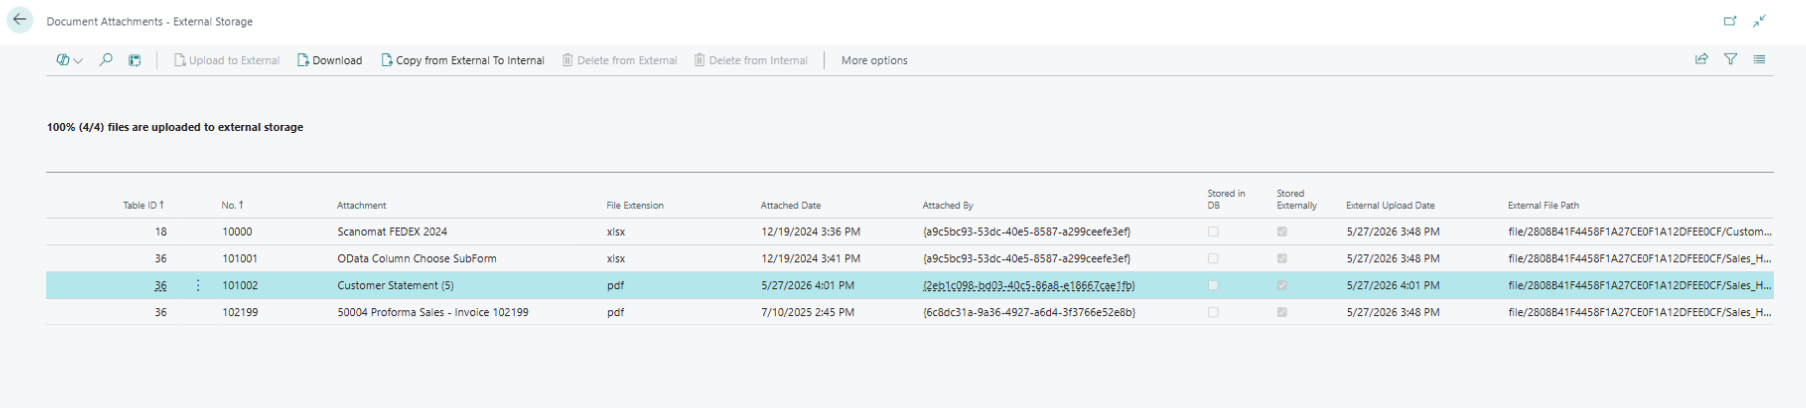
Four attachments tracked all four files are confirmed uploaded externally. The External File Path column shows the full SharePoint path for each.
Why External Document Storage Matters for Growing Businesses
As organizations scale their Business Central usage, attachment volume grows fast sales orders, invoices, contracts, compliance documents, and customer correspondence all accumulate inside the database over time. This isn’t just a storage concern; it directly affects system performance.
Every attachment stored internally adds to your database size, which can slow down backups, extend restore times, and increase your SQL licensing or cloud storage costs. By offloading these files to SharePoint, Business Central stays lean, while your documents live in a platform built specifically for file management complete with versioning, access controls, and Microsoft 365 search integration.
For businesses already using SharePoint or Microsoft Teams for collaboration, this also means your finance, sales, and operations teams can access the same customer or transaction documents without needing a Business Central license a meaningful advantage for cross-departmental workflows.
Quick-Start Summary: Follow these three steps to go live with external document attachment storage in BC 28: Request a Call
Best Practices Before You Go Live
Before rolling out external document storage across your production environment, a few precautions will save you troubleshooting time later:
- Test in a sandbox environment first. Validate the Entra ID app registration, permissions, and folder structure in a non-production BC environment before enabling it company wide.
- Set clear SharePoint folder permissions. Since BC will be writing files directly into SharePoint, make sure only the intended service account and admins have write access to the root folder.
- Decide your deletion policy upfront. The “Delete External File on Attachment Delete” toggle has compliance implications organizations with audit or retention requirements should keep this disabled so files remain in SharePoint even if unlinked in BC.
- Monitor the Document Attachments tab regularly. Use the built-in audit view to confirm uploads are completing successfully, especially in the first few weeks after go-live.
- Communicate the change to end users. Since the attachment experience inside BC doesn’t change visually, users may not realize files are now stored externally a short internal note prevents confusion if someone looks for files directly in SharePoint.
Need Help Setting Up External Document Storage in Business Central?
From Entra ID permissions to SharePoint folder structure Madhda’s Dynamics 365 specialists handle the entire setup, so you go live secure, compliant, and ready to scale.