 You-tube


Microsoft is rapidly transforming how organizations interact with ERP systems through AI. One of the most important building blocks in this transformation is the Model Context Protocol (MCP), which enables secure, structured communication between AI agents and enterprise systems like Dynamics 365 Business Central.
By configuring MCP Server in Business Central and connecting it to Copilot Studio, organizations can allow AI agents to query data, generate insights, and execute actions using natural language – while still respecting enterprise security and governance.
In this blog, we walk through a complete, step-by-step guide to creating and configuring MCP Server for Business Central and integration with Copilot Studio.
Watch: MCP Server for Business Central with Copilot Studio
To understand how MCP fits into the Business Central and Copilot Studio ecosystem, watch the video below. It explains how MCP Server acts as a secure bridge that allows AI agents to interact with ERP data and processes intelligently.
Video: Overview of MCP Server and Copilot Studio integration for Dynamics 365 Business Central
With this foundation in place, let’s move into the detailed configuration steps.
Step-by-Step Guide: MCP Server Setup for Business Central
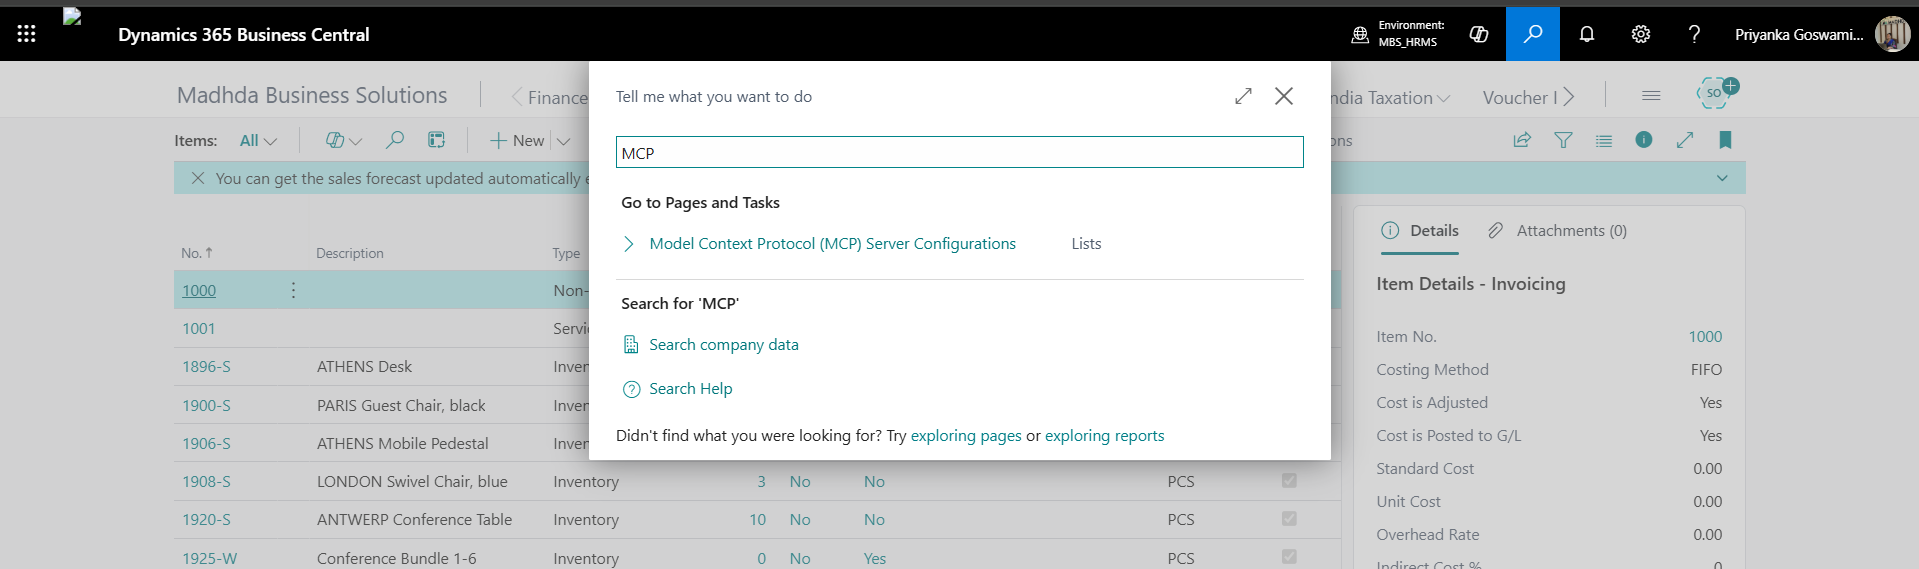
Step 1: Search MCP in Business Central
- In Dynamics 365 Business Central, use the global search and look for Model Context Protocol (MCP).
- This action opens the MCP Server setup area, where all configurations related to MCP are managed.
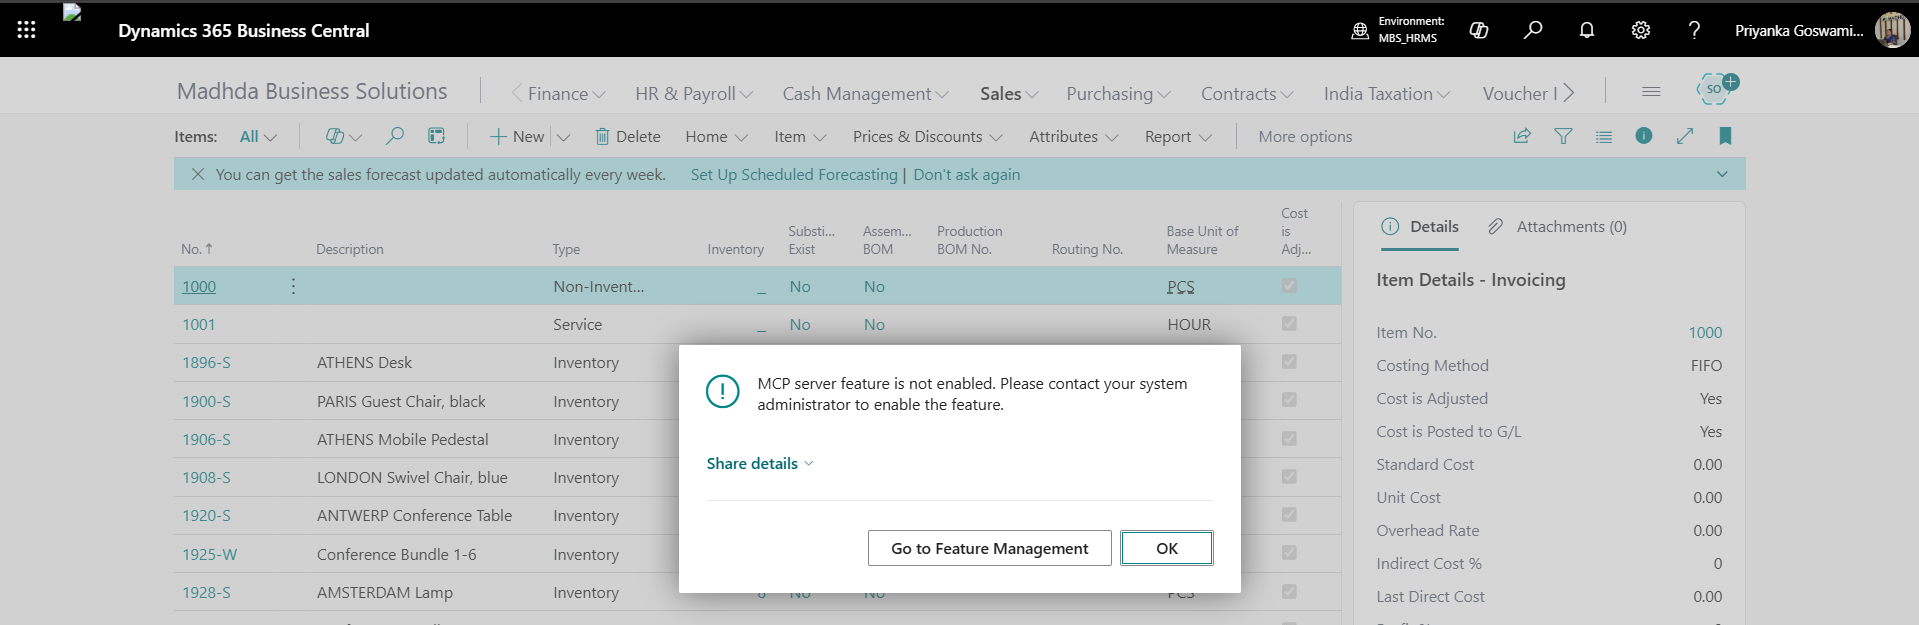
Step 2: MCP Server Feature Not Enabled Message
- When opening the Model Context Protocol Server page for the first time, you may see a message indicating that the feature is not enabled.
- This is expected behavior if MCP has not yet been activated in your environment. Click Go to Feature Management to proceed.
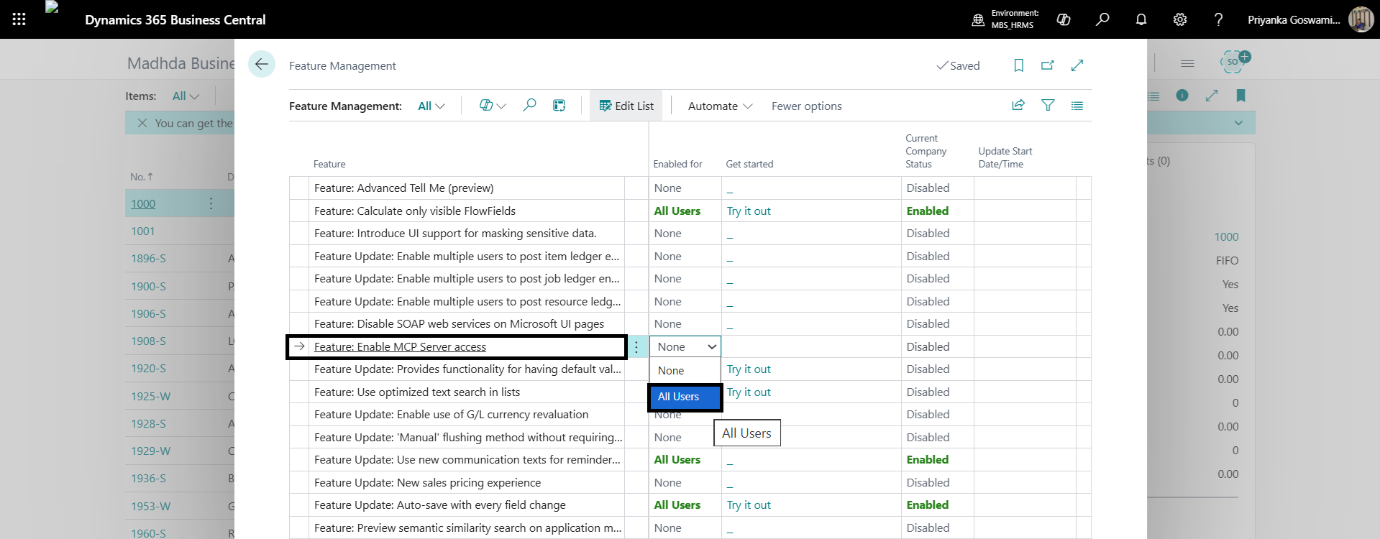
Step 3: Enable MCP Server Access in Feature Management
In the Feature Management page:
- Locate MCP Server Access
- Enable the feature by selecting Enable for All Users
This ensures that MCP Server functionality is available across the Business Central environment and not restricted to individual users.
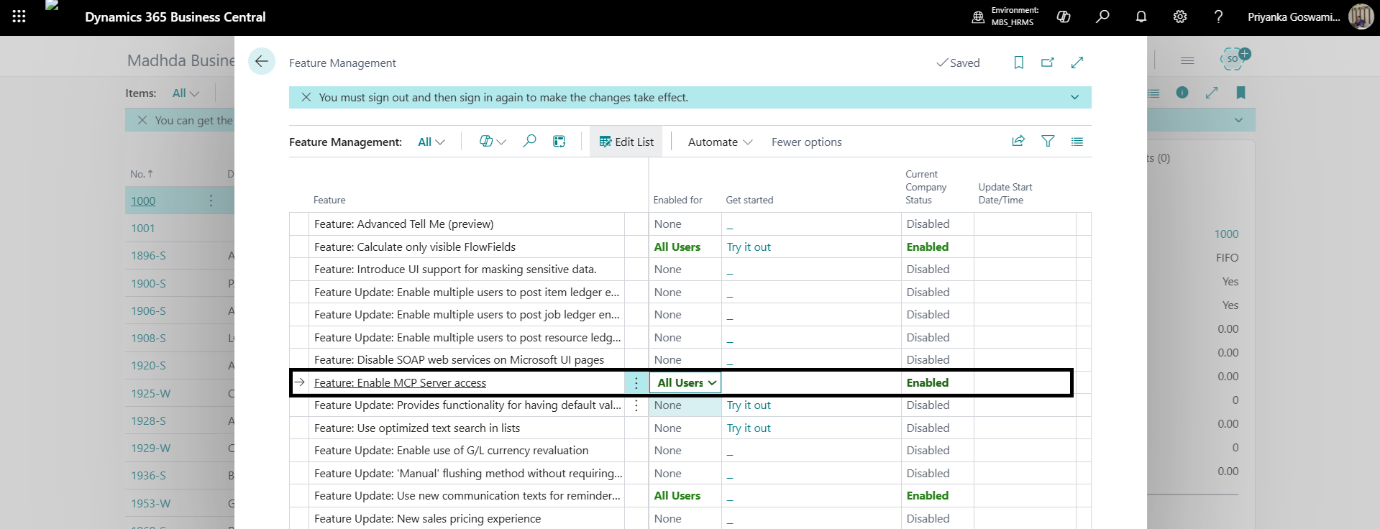
Step 4: MCP Server Access Enabled for Company
Once the feature is enabled for all users, MCP Server access is automatically activated for the current company.
No additional company-level configuration is required at this stage.
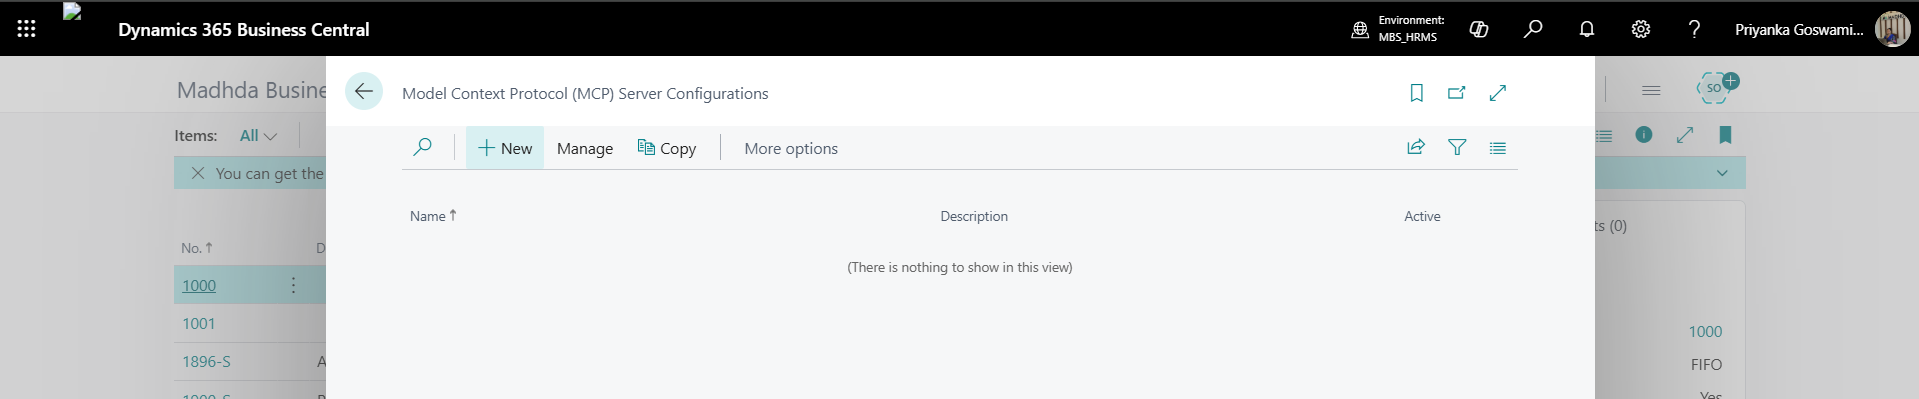
Step 5: Open Model Context Protocol Server Configuration
Navigate to the Model Context Protocol Server Configuration page and click New to create a new MCP Server configuration.
This configuration defines how Business Central will expose data and actions to AI agents.
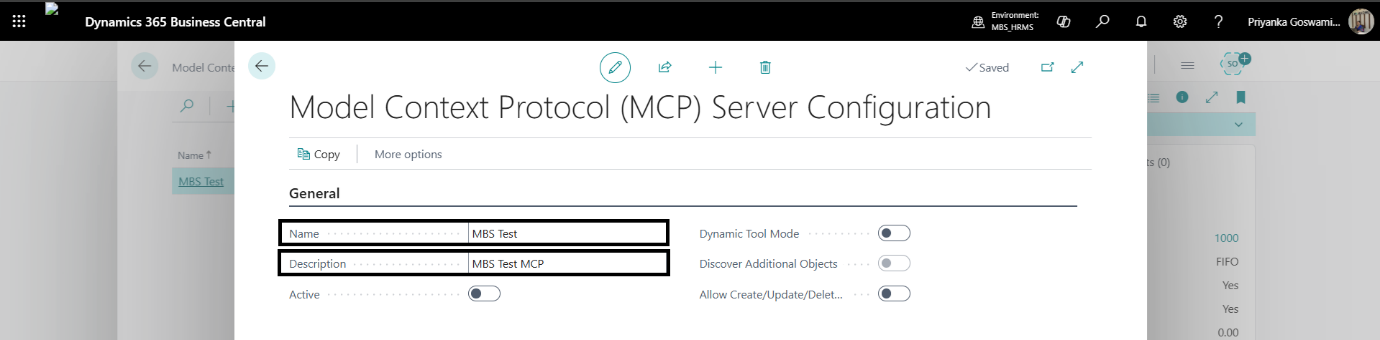
Step 6: Provide MCP Configuration Name and Description
Enter a meaningful Name and Description for the MCP Server configuration.
Use clear naming conventions so administrators and consultants can easily understand the purpose of this configuration when working with Copilot Studio or managing multiple MCP setups.
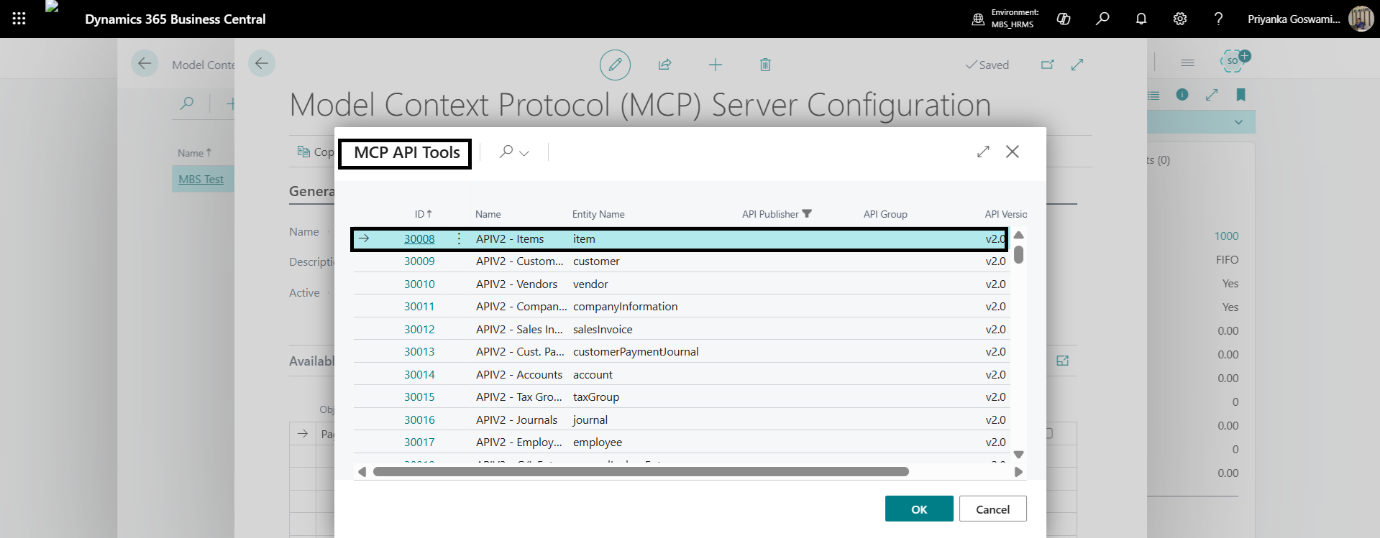
Step 7: Add MCP API Tools
Add the required API tools that the Copilot agent will access through the MCP Server. These may include:
- Standard API pages
- Custom API pages
The selected APIs define which Business Central data and operations are exposed to the AI agent.
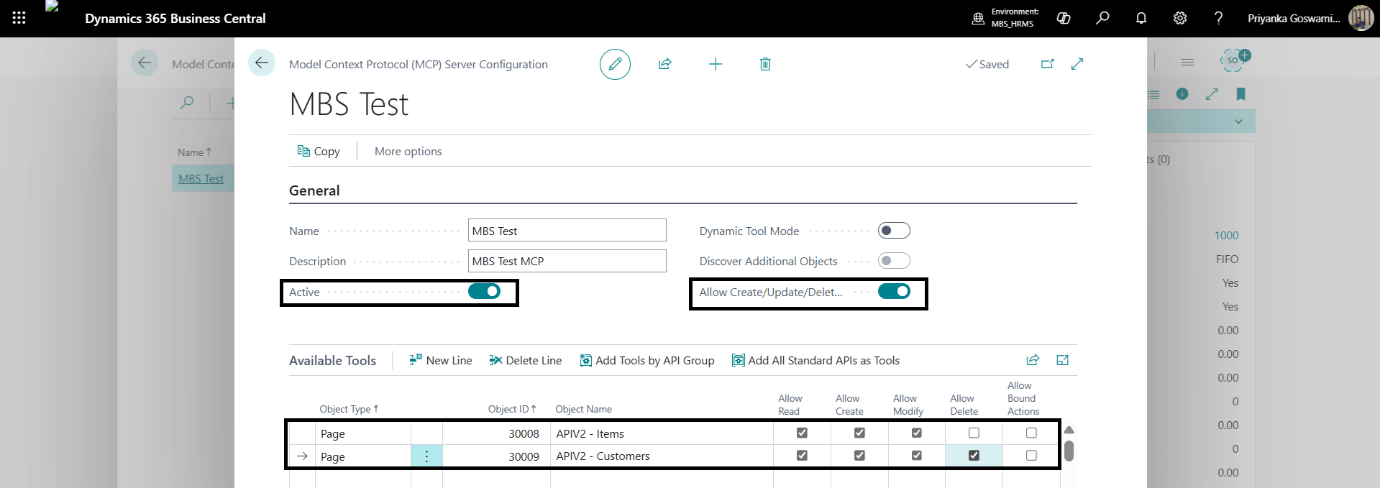
Step 8: Enable MCP Permissions
Activate the MCP configuration and enable the appropriate permissions, such as:
- Allow Create
- Allow Update
- Allow Delete
Permissions should align with the intended role of the AI agent and follow your organization’s security and governance policies.
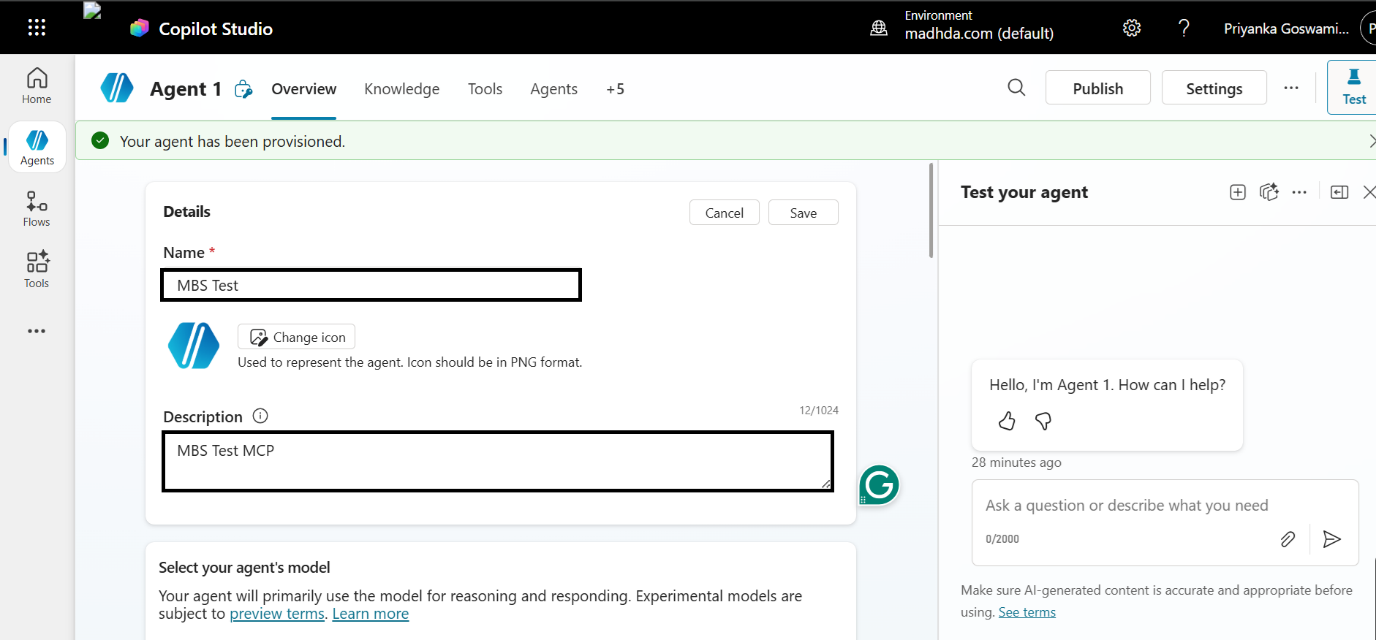
Step 9: Sign in to Copilot Studio and Create Agent
Sign in to Copilot Studio and create a new blank agent.
This agent will act as the interface between users and Business Central through the MCP Server.

Step 10: Enter Agent Name and Description
Provide a clear agent name and description that defines the agent’s purpose, such as finance queries, customer lookups, or operational support.
This helps maintain clarity as multiple agents are introduced across the organization.
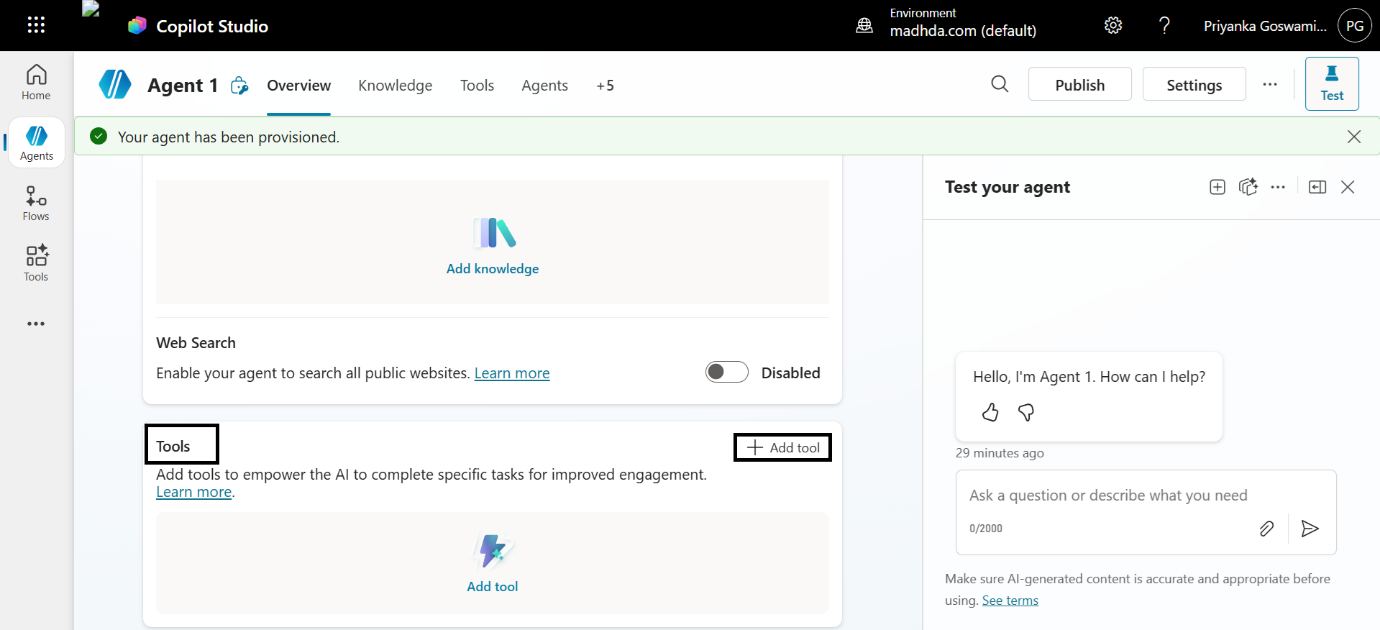
Step 11: Add Tool to the Agent
Within the agent configuration page:
- Navigate to the Tools section
- Click Add a tool to integrate external systems
This is where the connection to Business Central is established.
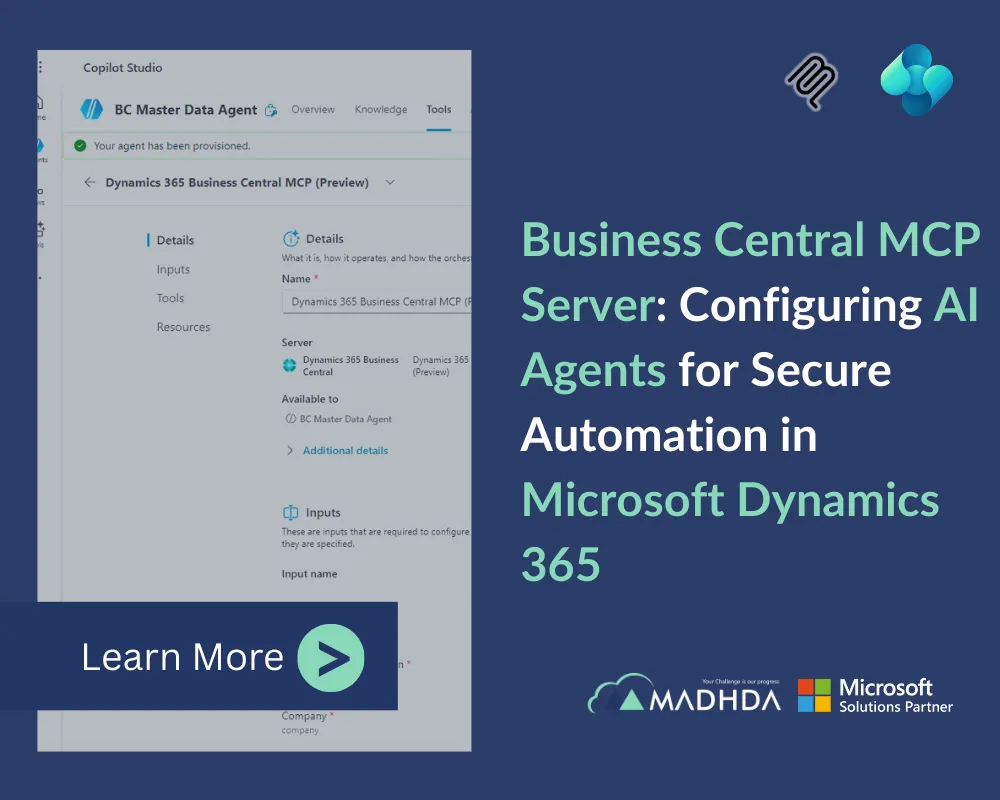
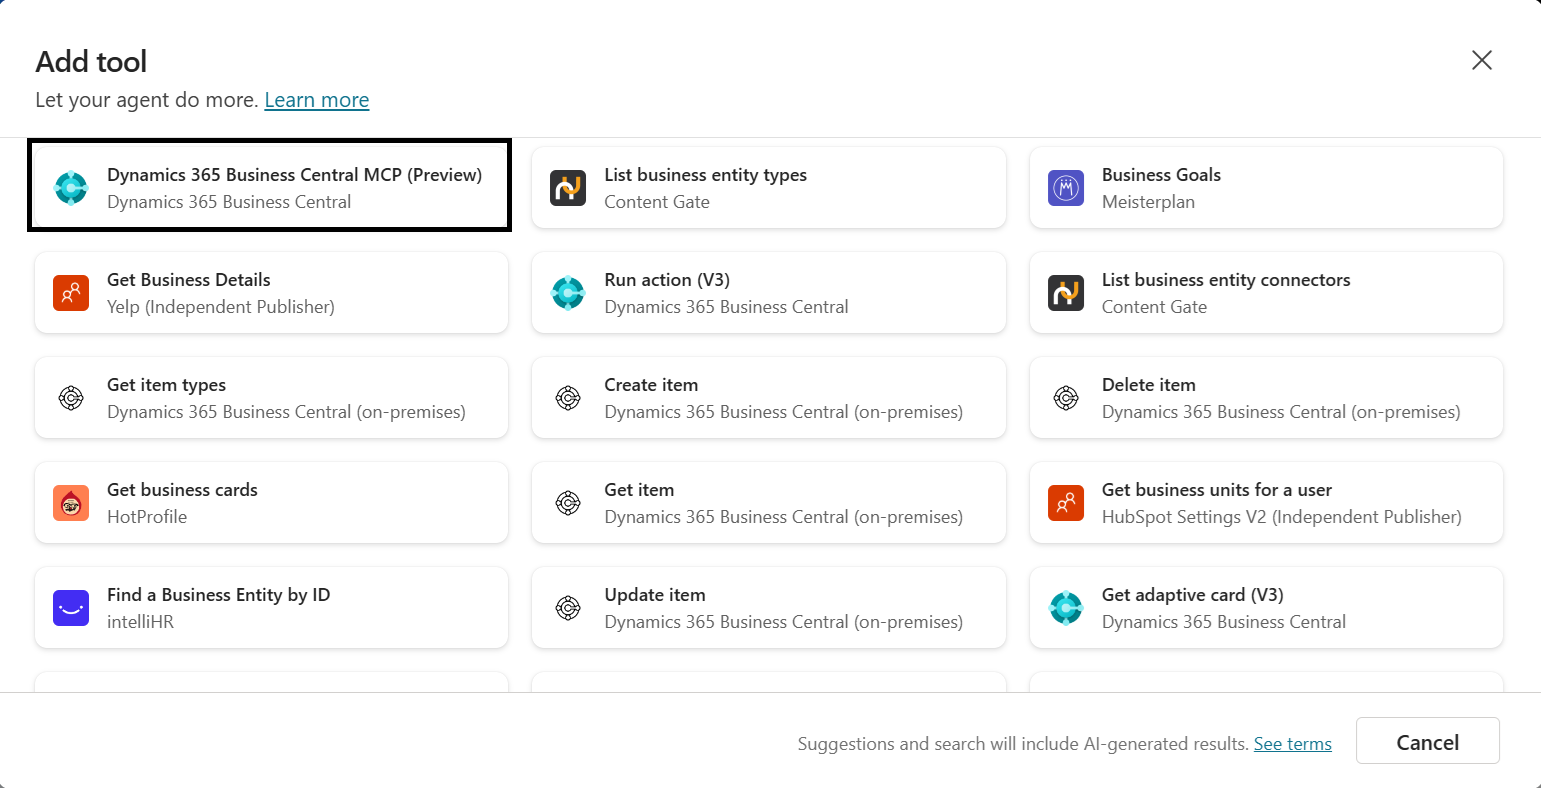
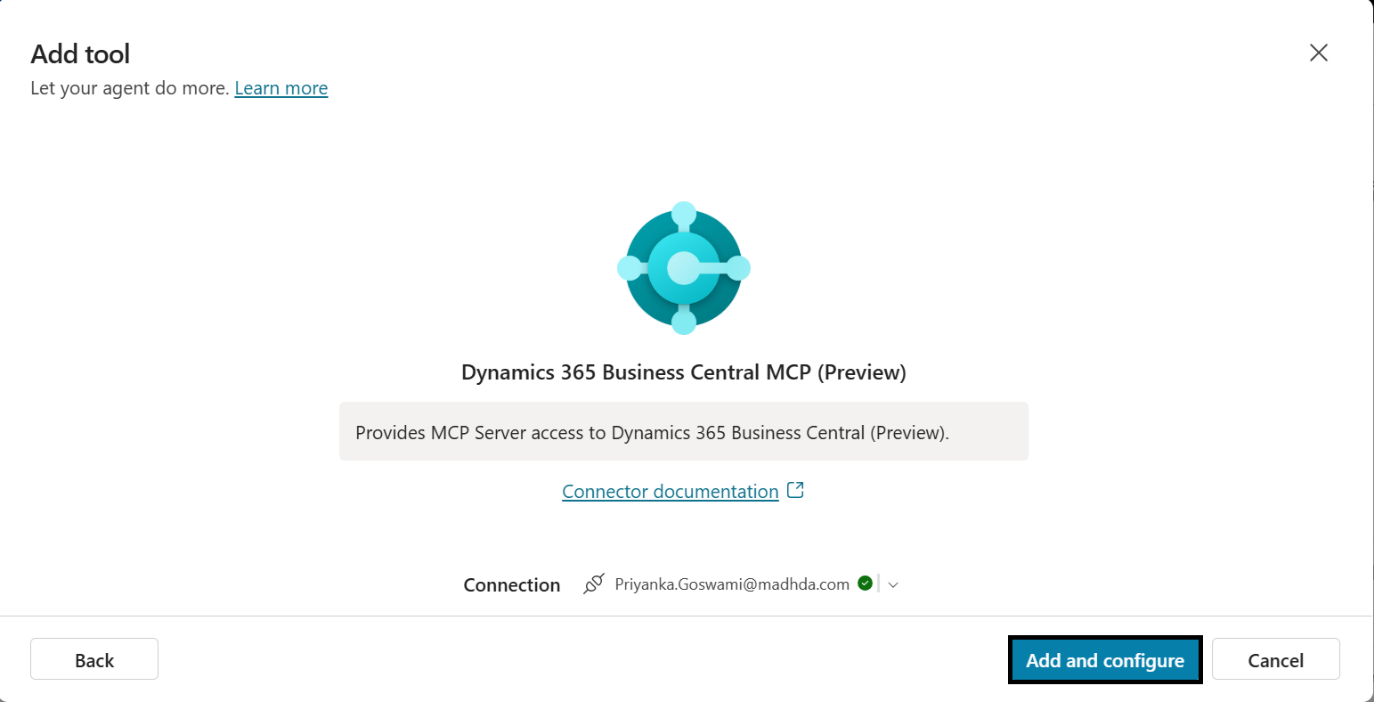
Step 12: Select Business Central MCP Tool
From the list of available tools, select Dynamics 365 Business Central MCP (Preview).
This enables MCP-based communication between the Copilot agent and Business Central.
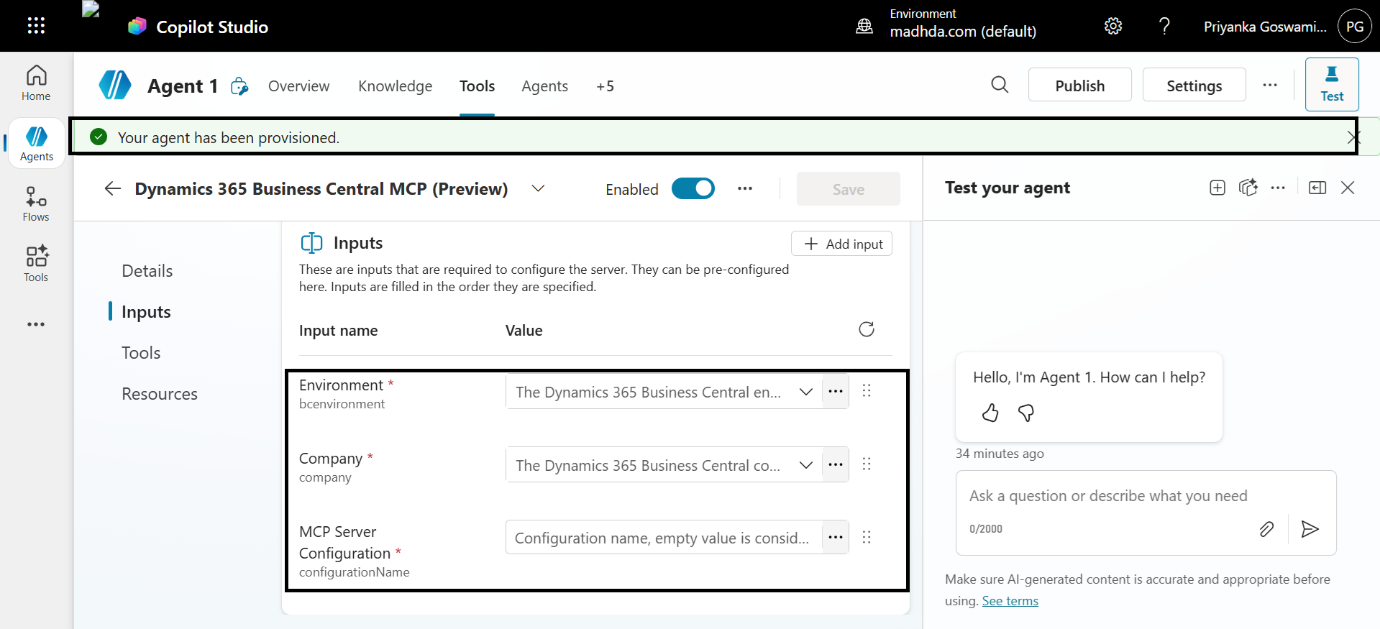
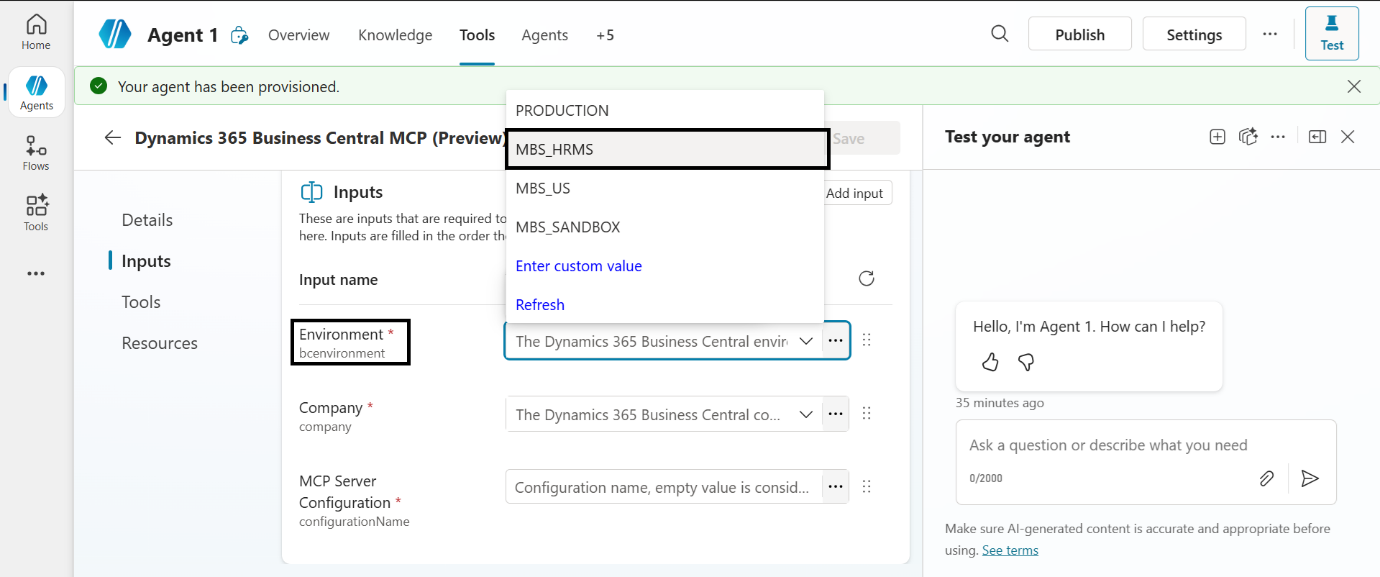
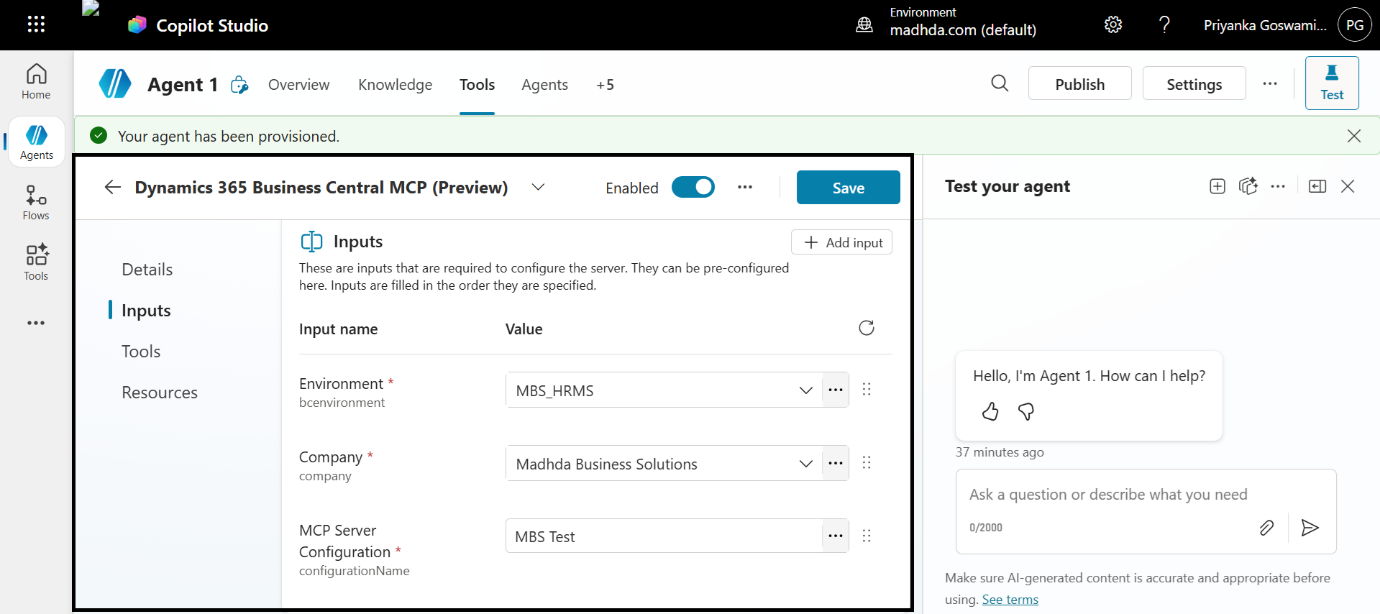
Step 13: Configure Business Central MCP Tool
Configure the tool by selecting:
- The appropriate Business Central environment
- The relevant company
- The MCP Server configuration created earlier
This binds the Copilot agent to the correct Business Central context.

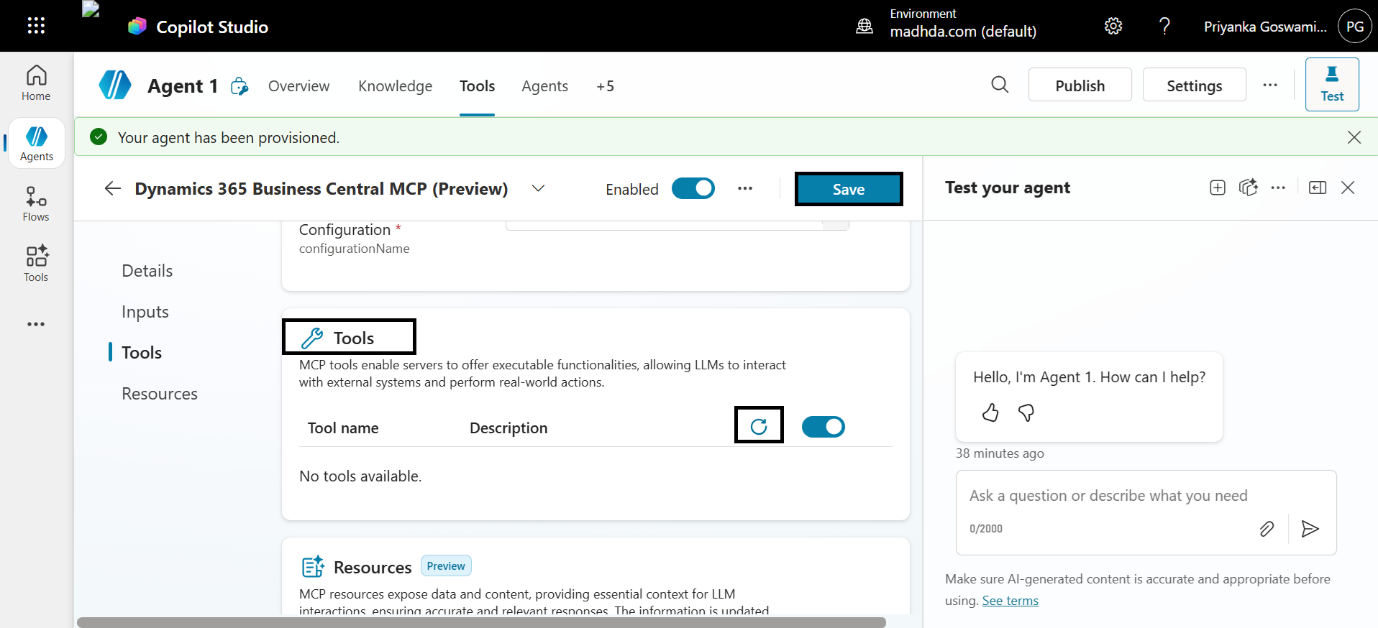
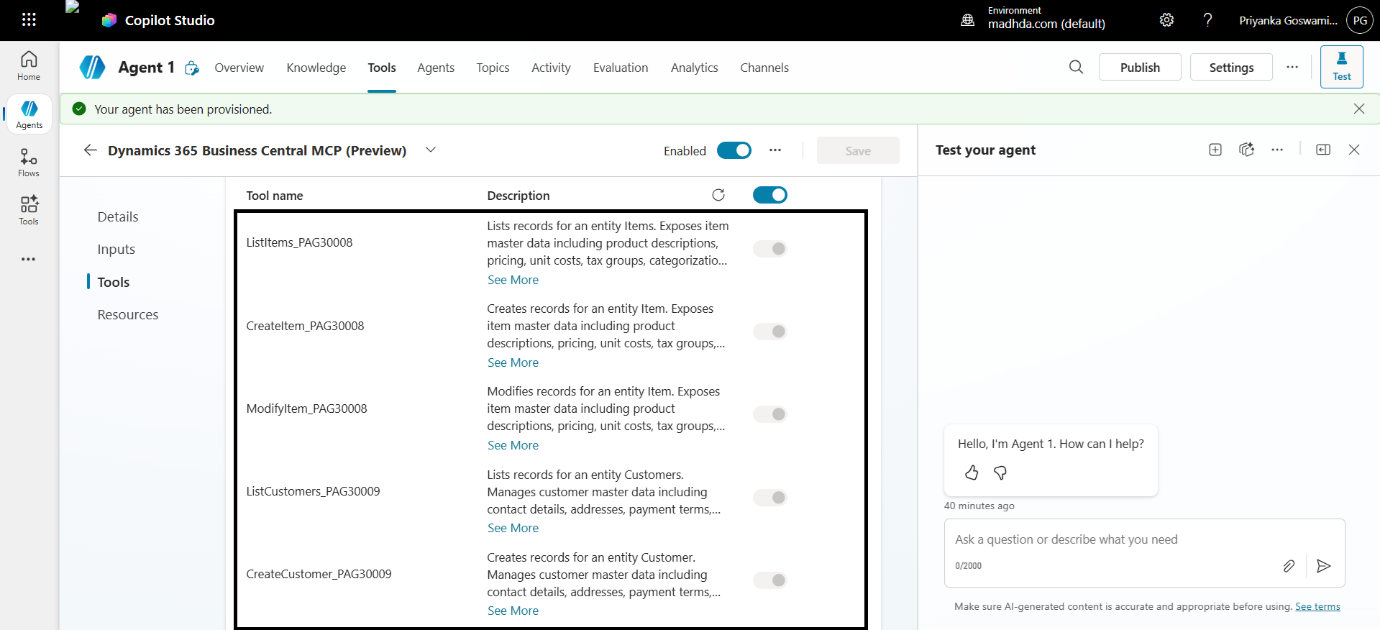
Step 14: Refresh MCP Tools
Click Refresh in the Tools section to load and synchronize the MCP tools and APIs available to the agent based on the selected configuration.
This step ensures the agent recognizes all exposed Business Central capabilities.
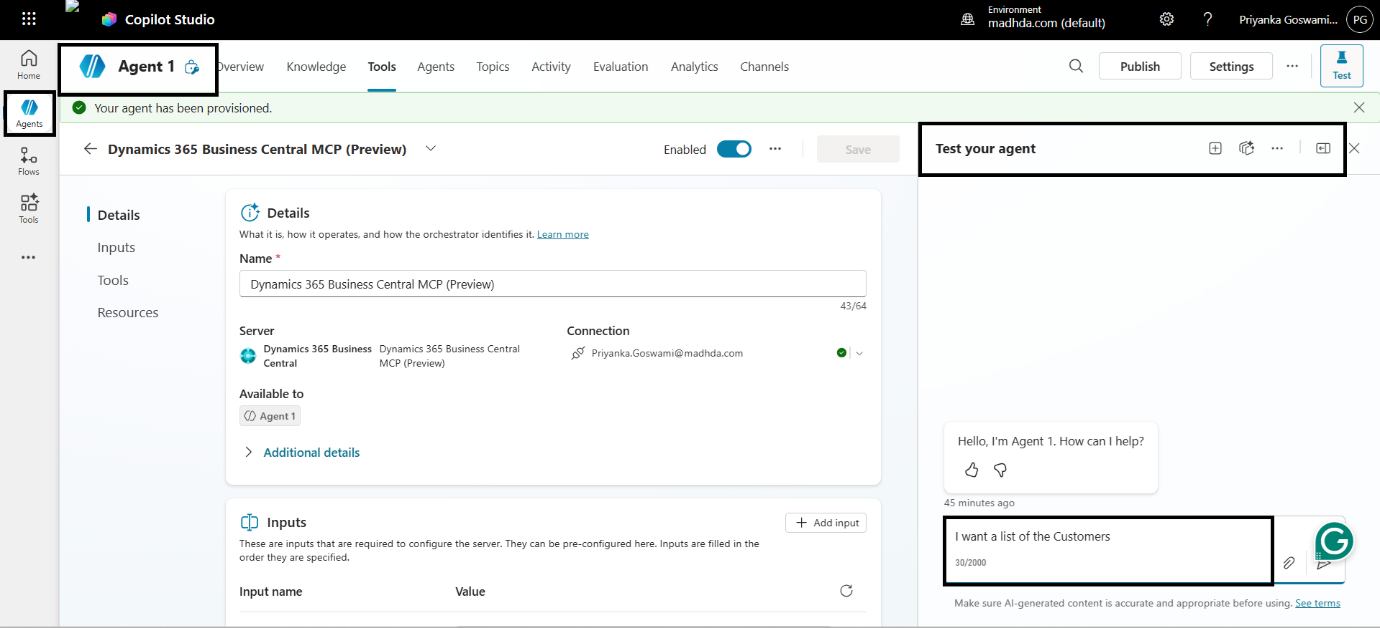
Step 15: Test the Agent
Test the agent using a natural language query, such as requesting a list of customers or checking basic ERP data.
This confirms that the MCP Server and Copilot Studio integration is functioning correctly.
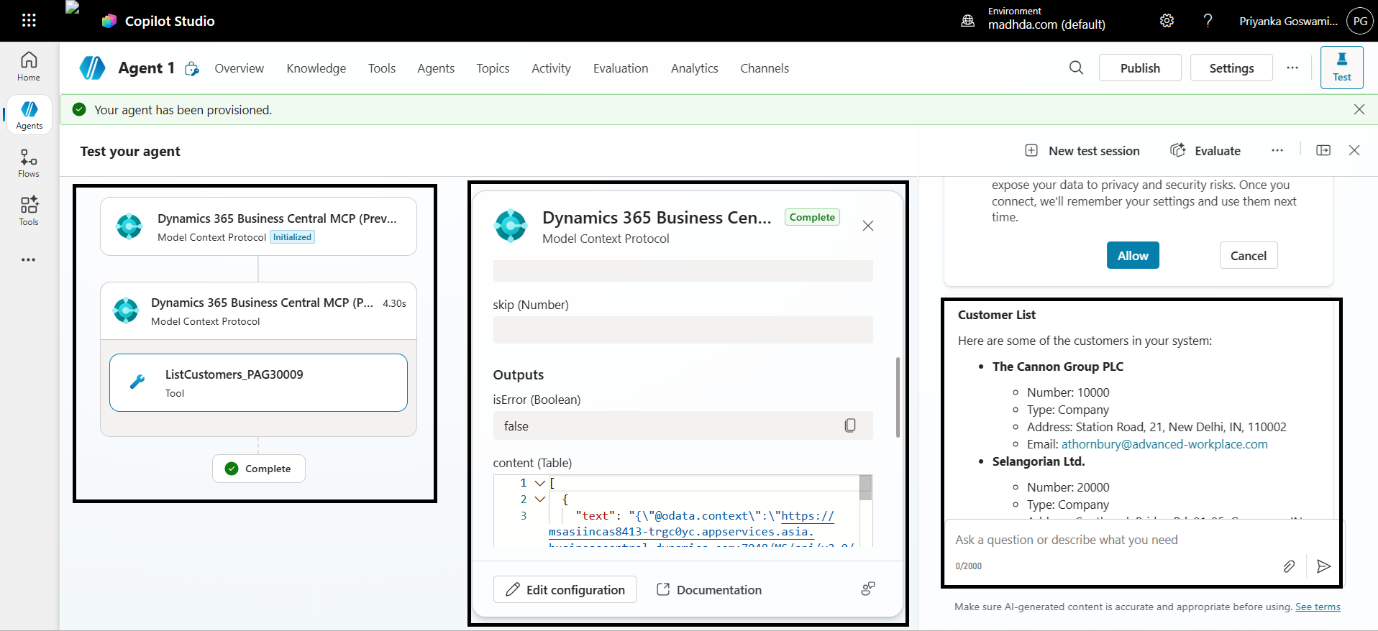
Step 16: View Agent Output
The agent successfully returns the requested data, such as the number of customers retrieved from Business Central.
This confirms end-to-end connectivity between Copilot Studio and Business Central via MCP Server.
Benefits of Using MCP Server for Business Central
Implementing MCP Server delivers significant business and technical value:
- Conversational Interaction: Users interact with ERP data using natural language instead of navigating complex menus.
- Reduced Development Effort: A standardized API layer eliminates repetitive custom integrations.
- Dynamic Scalability: Agents can access a wide range of ERP functions and customizations without frequent code changes.
- Enterprise-Grade Security: Existing RBAC and Microsoft Entra ID authentication are fully respected.
- Process Automation: Enables intelligent automation of workflows such as invoice follow-ups or operational alerts.
- Standardized Context for AI: Provides real-time business context, so AI agents act as informed digital assistants.
What’s Next?
This MCP Server setup forms the foundation for multi-agent architectures in Business Central, where specialized AI agents collaborate across finance, sales, and operations.
In our next blog, we’ll explore multi-agent architecture for Business Central as part of the broader Digital AI journey.
Stay tuned.