 You-tube


Exporting an EFT (Electronic Funds Transfer) payment file from Microsoft Dynamics 365 Business Central is a routine yet critical operation for any finance team that runs supplier payments electronically. A correctly generated EFT file ensures vendors are paid on time, reduces manual entry errors, and supports stronger bank reconciliation and cash-flow management. While the mechanics vary depending on your bank’s required file format, the core goal is the same: produce a bank-ready file that contains all approved payments, formatted to the bank’s specification and ready for secure upload.
This guide walks you through the practical steps to prepare, validate, and export EFT payment file from Business Central. It assumes basic familiarity with posting batches, vendor payment journals, and the setup of bank accounts and payment methods in Business Central. Before you begin, confirm your bank’s required file layout, ensure vendor bank details and payment methods are up to date, and – if possible – run the process first in a sandbox environment to avoid unintended live payments. Follow the steps below to make your payment runs efficient, auditable, and bank compliant.
Step 1: Bank Account Setup
Navigate to Bank Account Card for your company’s bank account.
Under the Transfer FastTab, set up the export details:
- Country Export Format: US
- E-Pay Export File Name: Enter your ACH or ABA format file name (e.g., ACH00003).
- Payment Export Format: Select US EFT CCD.
- Transit No: Enter your bank’s routing number.

This defines how Business Central formats and generates the EFT file for US electronic payments.
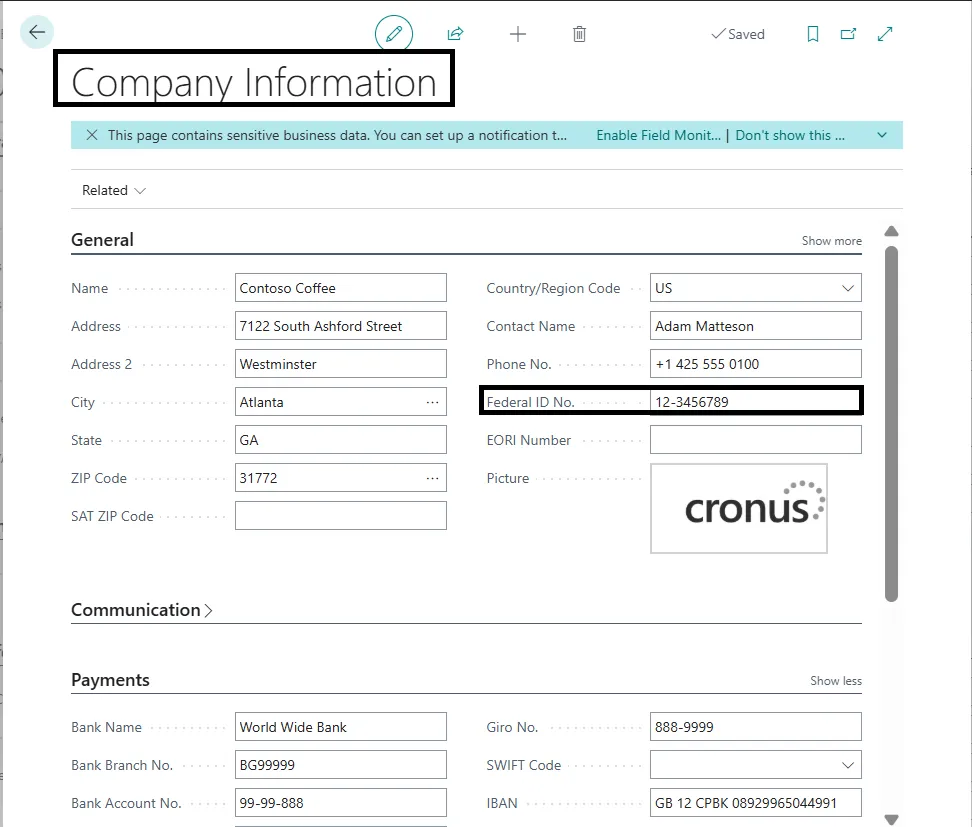
Step 2: Company Information Setup
The Federal ID No. (or EIN) in the Company Information page identifies your company as the originator of the electronic payment file.
Step 3: Vendor Card Setup
Open the Vendor Card for each vendor:
- Payment Method Code: Select BANK.
- Preferred Bank Account Code: Choose the vendor’s bank account (e.g., ECA).
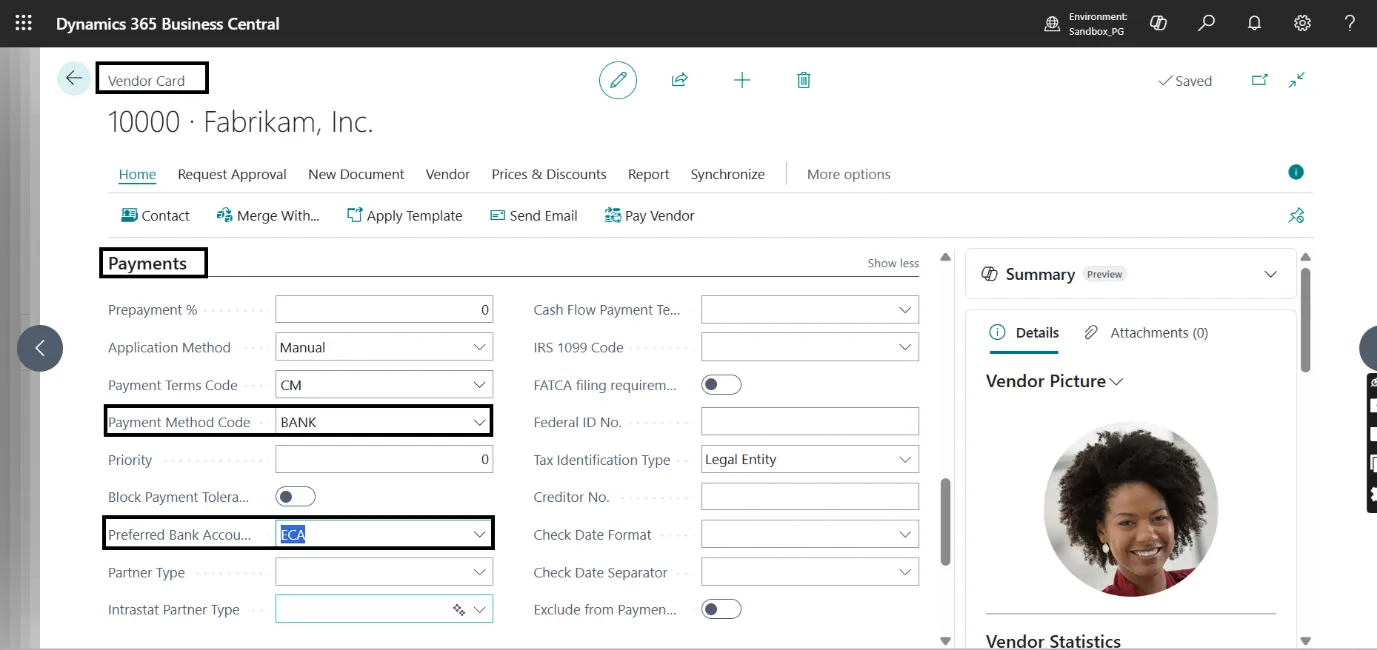
This ensures vendor payments are directed to their preferred bank account during the EFT process.
Step 4: Vendor Bank Account Setup
From the Vendor Card, select Navigate → Bank Accounts, and open the existing bank account or create a new one.
- Bank Account No.: Enter the vendor’s bank account number (e.g., 1200 100003).
- Transit No.: Enter the bank’s routing or transit number (e.g., 123000048).
- Country/Region Code: Select the vendor’s country or region (e.g., GB).
- SWIFT Code / IBAN: Provide the SWIFT and IBAN details if applicable for international transfers.
- Bank Name / Code: Optionally include the bank name or short code for reference.
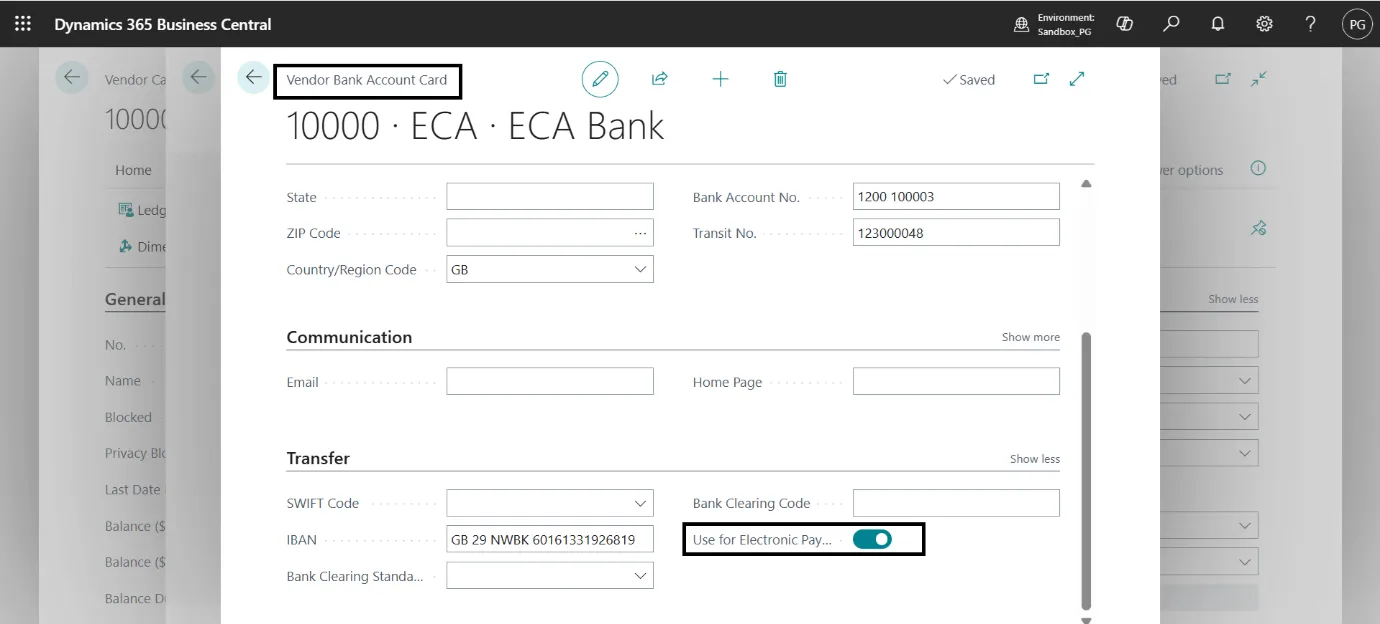
In the Transfer section, turn on the Use for Electronic Payments toggle.
Step 5: Create a Payment Journal Batch
From Payment Journals, select or create a batch (e.g., PMT REG):
- Bal. Account Type: Bank Account
- Bal. Account No.: Select the appropriate checking account.
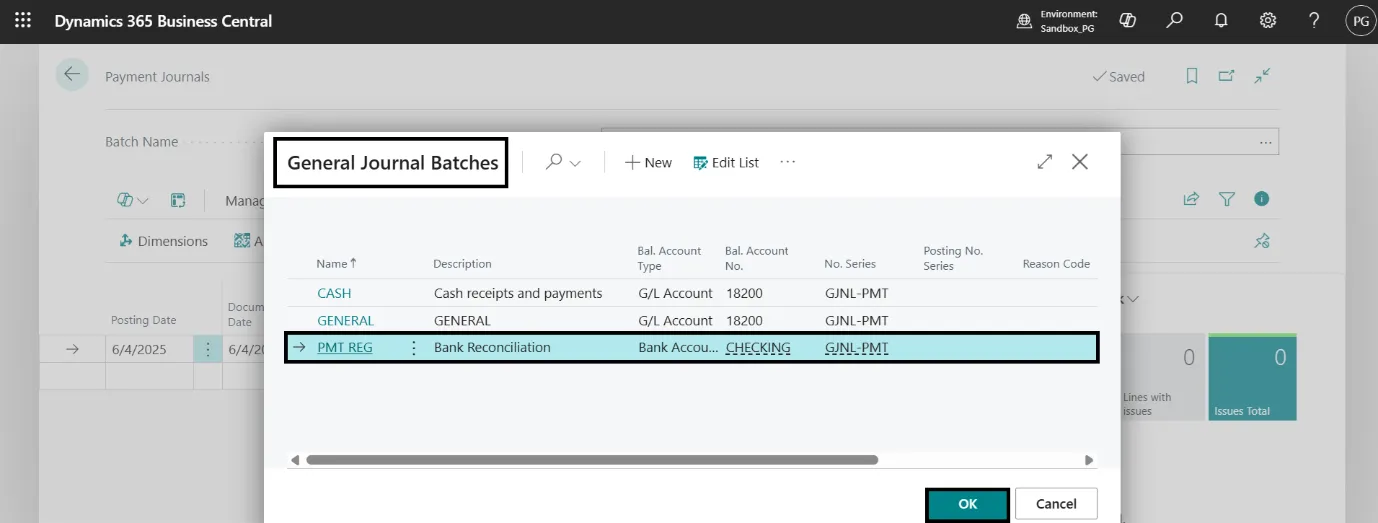
This defines the batch used for vendor payment processing.
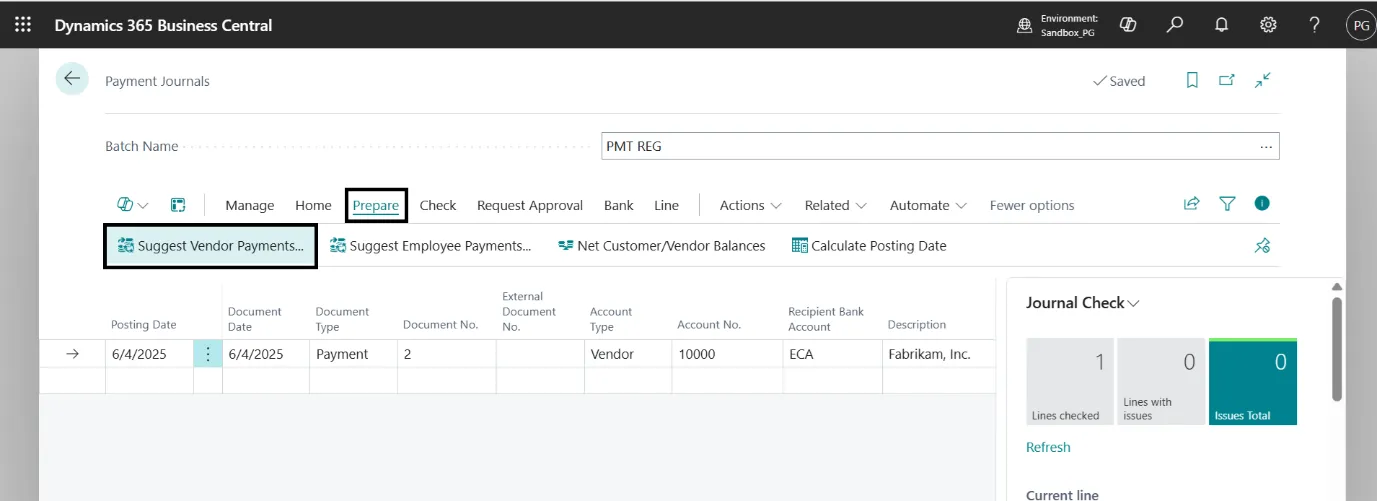
Step 6: Suggest Vendor Payments
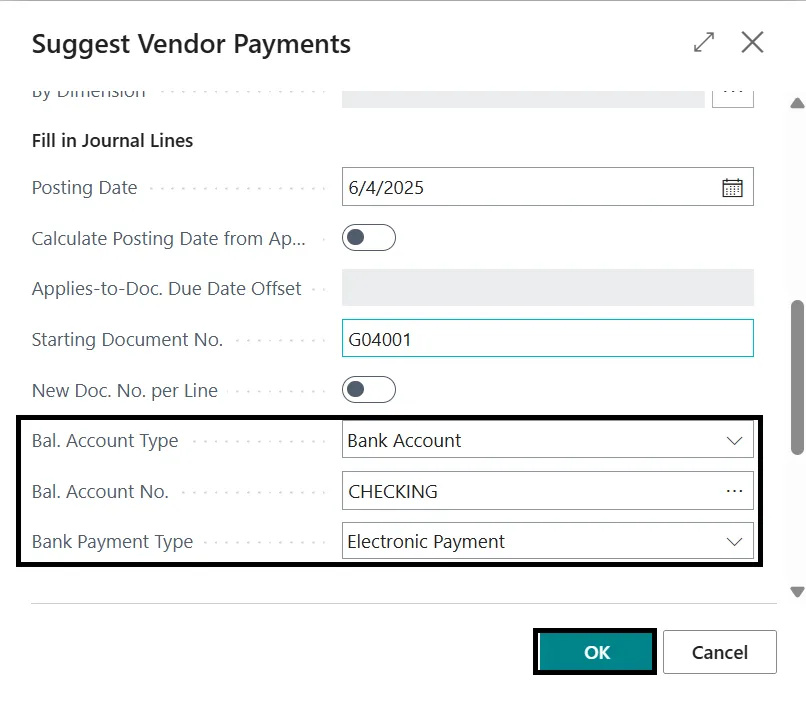
Select Prepare → Suggest Vendor Payments and fill in:
- Posting Date: Desired date (e.g., 6/4/2025)
- Bal. Account Type: Bank Account
- Bal. Account No.: CHECKING
- Bank Payment Type: Electronic Payment
Click OK to populate the payment journal with vendor invoices eligible for EFT payments.
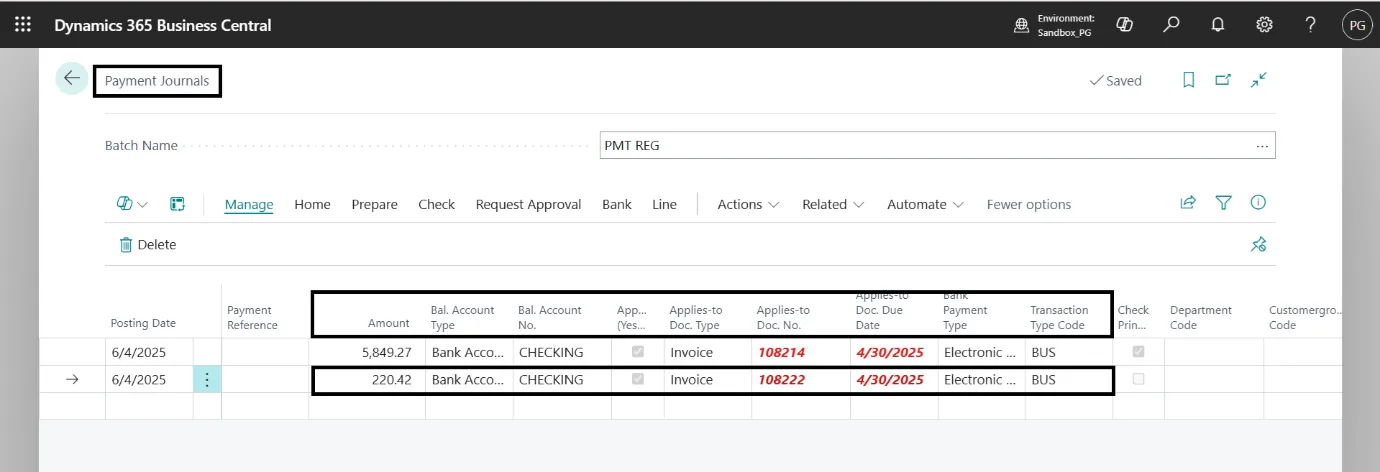
Step 7: Review Payment Journal
Verify the suggested payments in the Payment Journal:
- Account Type: Vendor
- Applies-to Doc. Type: Invoice
- Bank Payment Type: Electronic Payment
- Transaction Type Code: BUS
Ensure all details (amounts, vendors, due dates) are correct.
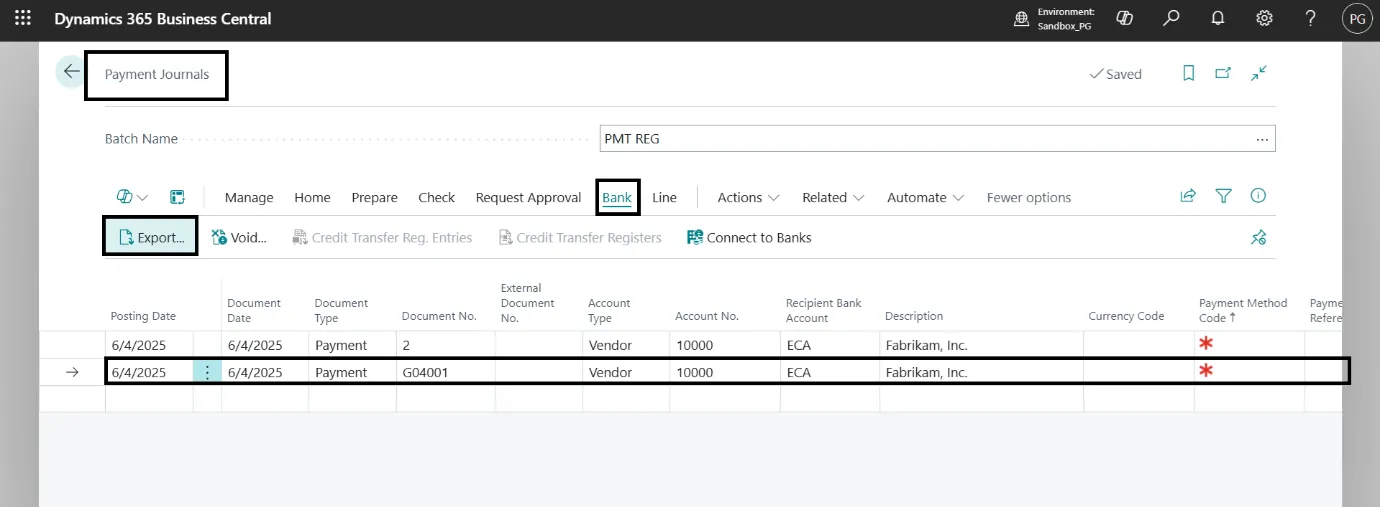
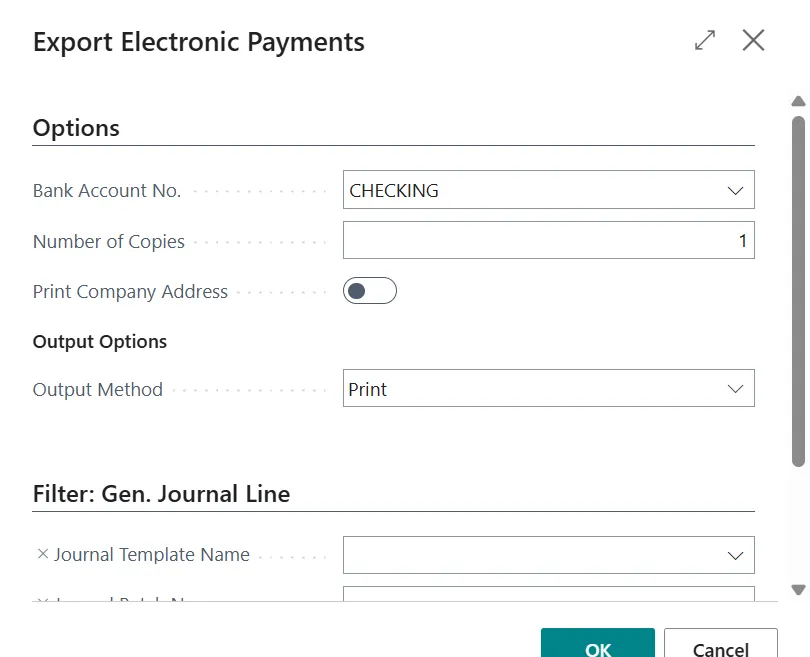
Step 8: Export EFT File
Go to Bank → Export within the Payment Journal.
In the Export Electronic Payments window:
- Bank Account No.: Select the bank (e.g., CHECKING)
- Output Method: Print or File
- Click OK to generate and export the EFT file (.aba or .ach).
The file can now be uploaded to your bank portal for processing vendor payments electronically.
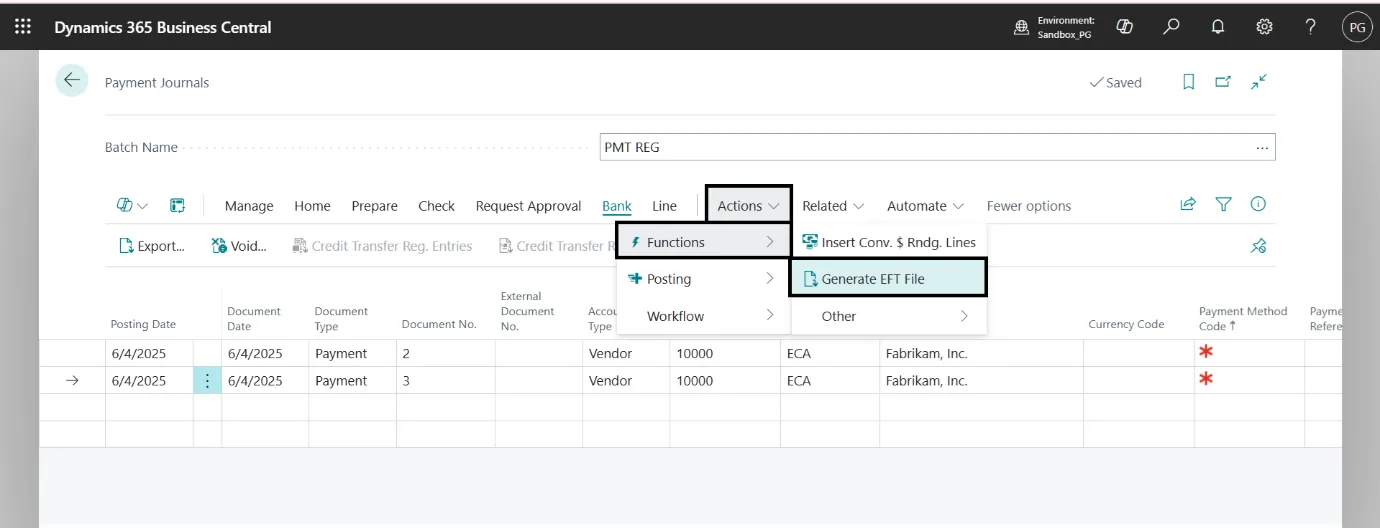
Step 9: Generate EFT File
Alternatively, you can directly generate the EFT file:
- Go to Actions → Functions → Generate EFT File.
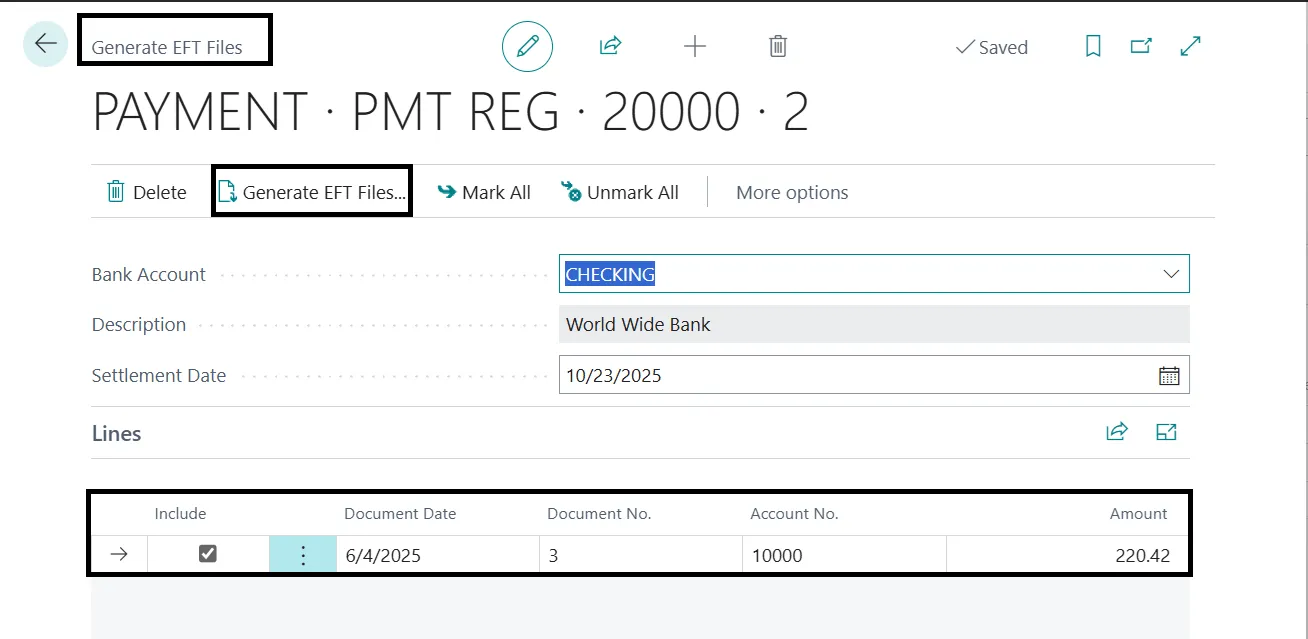
This opens the Generate EFT Files page.
Key Fields:
- Bank Account: Select your active bank account (e.g., CHECKING).
- Description: The bank account description (e.g., World Wide Bank).
- Settlement Date: Enter the settlement date for EFT processing (e.g., 10/23/2025).
Under Lines, select the transactions to be included in the EFT file by checking the Include box.
Sample EFT File Output
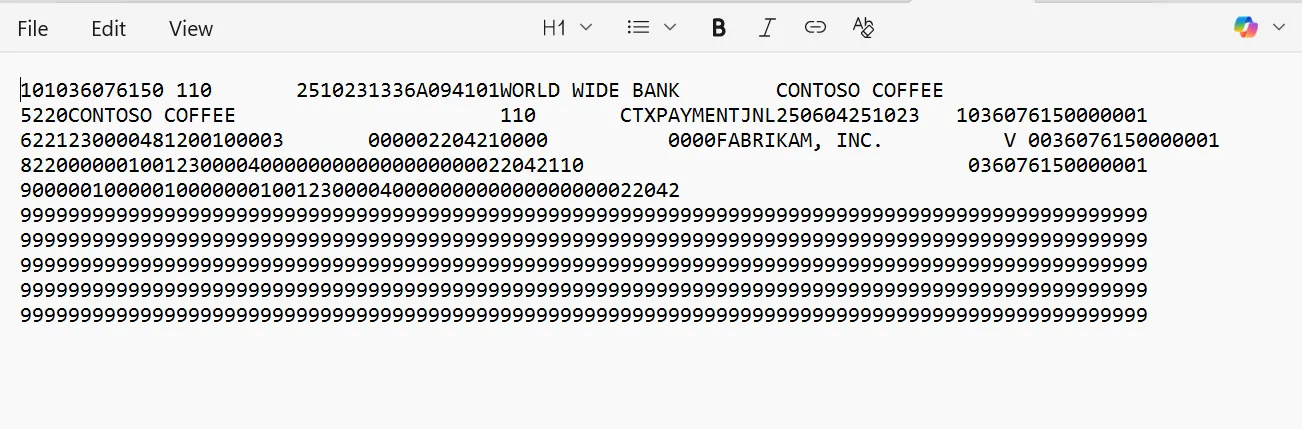
Note: For Australian region, this can be generated as .aba file format.
Conclusion
Export EFT payment file from Business Central is a high-value process: when done correctly it reduces payment errors, accelerates reconciliation, and improves overall treasury controls. The step-by-step process you followed in this guide will help ensure your outgoing payments are accurate, traceable, and formatted to your bank’s requirements. Regular checks—updating vendor banking details, validating payment batches, and reviewing bank file previews—will keep the process reliable and audit-ready.
If your team would like to streamline EFT processing, validate bank file formats, or automate payment runs in Business Central, Madhda Inc. can help. Our consultants specialize in configuring secure payment workflows, mapping bank file formats, and building controls that scale with your business. We offer implementation, testing in sandbox environments, and ongoing managed services so your finance team can close faster and pay with confidence.
Ready to simplify your payment runs?
Contact Madhda to schedule a free assessment of your Business Central payment processes, or request help configuring EFT exports tailored to your bank and business rules.