Import to Excel Data Report in Business Central allows users to export data from Business Central directly into Microsoft Excel for further analysis, reporting, or manipulation. This feature enables users to generate customized reports tailored to their specific needs by extracting relevant data from Business Central and presenting it in a familiar Excel format.
To import data into an Excel report in Microsoft Dynamics 365 Business Central, you typically follow these steps:
Step 1:-
Open Visual Studio code
Here is home window of Visual studio code

Step 2:-
Download Symbols
Press F1 and Select download symbols after download symbols.
Step 3:-
Create New File with save as Name. Al extension name like (TestReport.al)
Click On your Created new report

Step 4:-
Create TReport Structure it will show full report structure.

Step 5:-
Set the Id & Report and select the field according you.
And set the all report Property like Red marks value and extension name

Step 6:-
here is the report code


Step 7:-
Publish Project with (Ctrl+shift+B) F5
Bellow is the home page search your page where is report button like

Search “new Customer” its test custom page

Step 8:-
Go to action button and click your button then run report.
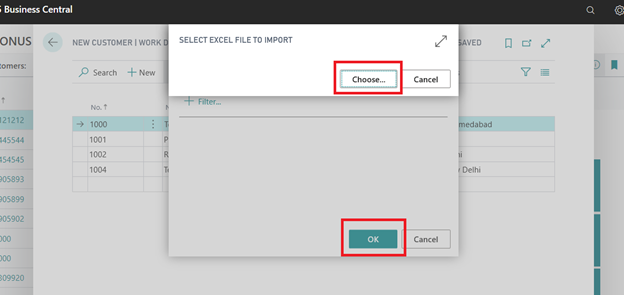
Then will open Report request page choose ok button after clicking ok button will open one dialog box like choose button

Click on choose button then will open file selection dialog box

Step 9:-
select your file then click on open button after that your data has been updated

Here is excel file
Final data updated row no. 4th is updated.

Thank you for investing your time to read our blog! We’re passionate about sharing valuable insights to help you navigate the world of Business Central.
If you’re curious about how we can assist you in reaching your goals, don’t hesitate to get in touch. Our dedicated team is ready to provide support every step of the way.
Let’s turn your vision into reality together!


